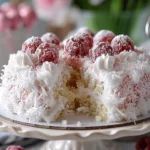
Introduction to Snowball Cake
If you’ve ever dreamed of a dessert that’s as delightful to look at as it is to eat, snowball cake should be at the top of your list. This enchanting dessert, with its fluffy layers and snowy icing, creates an experience that is both visually stunning and utterly delectable. But what makes snowball cake the perfect homemade treat? Let’s take a closer look.
Why Snowball Cake is a Perfect Homemade Dessert
Imagine serving a cake that draws oohs and aahs right from the moment you set it on the table. Snowball cake not only achieves that effect, but it’s also incredibly versatile. Here are a few reasons to love this dessert:
- Creative Flexibility: You can customize the flavor profile, from classic vanilla to rich chocolate or even seasonal variants like red velvet. Your imagination is your only limit!
- Layered Texture: The combination of moist cake layers with fluffy frosting provides a satisfying mouthfeel. Each bite is a balance of tenderness and creaminess that guests rave about.
- Perfect for Celebrations: Whether it’s a birthday party, holiday gathering, or casual weekend treat, snowball cake suits any occasion, elevating it from ordinary to extraordinary.
Did you know that the concept of beautifully decorated cakes can be traced back centuries? According to Food Timeline, decorative cakes became popular in the 19th century, fueled by the rise of sugar refinement and the advent of baking powder. Snowball cakes, with their white, fluffy appearance, channel the spirit of that tradition.
When you opt to bake a snowball cake at home, you’re not just whipping up a dessert; you’re creating memories. Picture gathering with friends or family, sharing laughs as you frost the layers. When you present it, it becomes more than just cake — it’s a centerpiece of connection and joy.
Isn’t it wonderful how food can bring people together? So grab your apron and get ready to wow your loved ones with this charming and delicious snowball cake! Remember, the effort you put into creating this masterpiece will be rewarded with smiles and sweet satisfaction.
Ingredients for Snowball Cake
Essential ingredients for a delightful snowball cake
Creating a snowball cake is a delightful experience, where simple ingredients come together to make something extraordinary. Here’s what you’ll need:
- Cake Flour: This fine flour gives your cake that delicate crumb.
- Granulated Sugar: Sweetness is key—this is what balances your flavors.
- Baking Powder: For that light and fluffy texture.
- Salt: A pinch enhances all the flavors beautifully.
- Unsalted Butter: The richness of butter adds depth to your cake.
- Eggs: Vital for binding everything together and adding moisture.
- Milk: Keep your batter smooth and flavorful.
Optional ingredients for variations
Feeling adventurous? Here are some optional ingredients to customize your snowball cake:
- Coconut Flakes: For an extra layer of flavor and texture.
- Fruit Purees: Try raspberry or blueberry for a burst of freshness.
- Chocolate Chips: Because who doesn’t love a bit of chocolate?
- Almond Extract: Adds a hint of sophistication.
For more insights on ingredient substitutions, check out the Kitchn. Embrace your creativity, and let’s get baking!
Preparing the Snowball Cake
Making a snowball cake is not just about following a recipe; it’s an experience that fills your kitchen with delightful aromas and your heart with joy. Whether you’re preparing it for a special occasion or simply to indulge in a sweet treat at home, it’s essential to take each step carefully. Let’s dive into the process!
Gather and Measure the Ingredients
Before diving in, take a moment to gather all your snowball cake ingredients. Having everything within reach makes the process smoother and more enjoyable. Here’s what you’ll need:
- All-purpose flour
- Baking powder
- Salt
- Unsalted butter (make sure it’s softened)
- Granulated sugar
- Eggs (preferably room temperature)
- Vanilla extract
- Whole milk
- Raspberry preserves
- Flaked coconut, for coating
Measure out each ingredient precisely. Accurate measurements can make all the difference in baking. If you’re looking for a reliable ingredient converter, check out King Arthur Baking.
Whisk Together Dry Ingredients
In a mixing bowl, it’s time to whisk together your dry ingredients. Combine the all-purpose flour, baking powder, and salt. This simple step ensures that the leavening agent is evenly distributed, which will help your cake rise beautifully. Use a whisk until there are no lumps—this will contribute to a light and fluffy texture.
Cream the Butter and Sugar
Next, in a large bowl, cream the softened butter and granulated sugar together using a handheld mixer or stand mixer. Aim for a light and fluffy consistency, which typically takes about 3-5 minutes. This process is crucial because it incorporates air into the batter, which is key for that perfect lightness in your snowball cake.
Incorporate the Eggs and Vanilla
Once your butter and sugar are nice and fluffy, it’s time to add the eggs—one at a time. Mixing each egg thoroughly before adding the next ensures that everything blends seamlessly. Don’t forget to add a splash of vanilla extract to enhance the flavors. How could we resist? It’s the magic ingredient that ramps up the taste!
Alternate Adding Dry Ingredients and Milk
Now, it’s time to bring everything together! Gradually add your dry ingredients to the butter mixture, alternating with the milk, starting and ending with the dry ingredients. This technique helps maintain the cake’s structure and prevents it from becoming too dense. Mix until just combined; be careful not to overmix!
Layer and Swirl the Batter with Raspberry Preserves
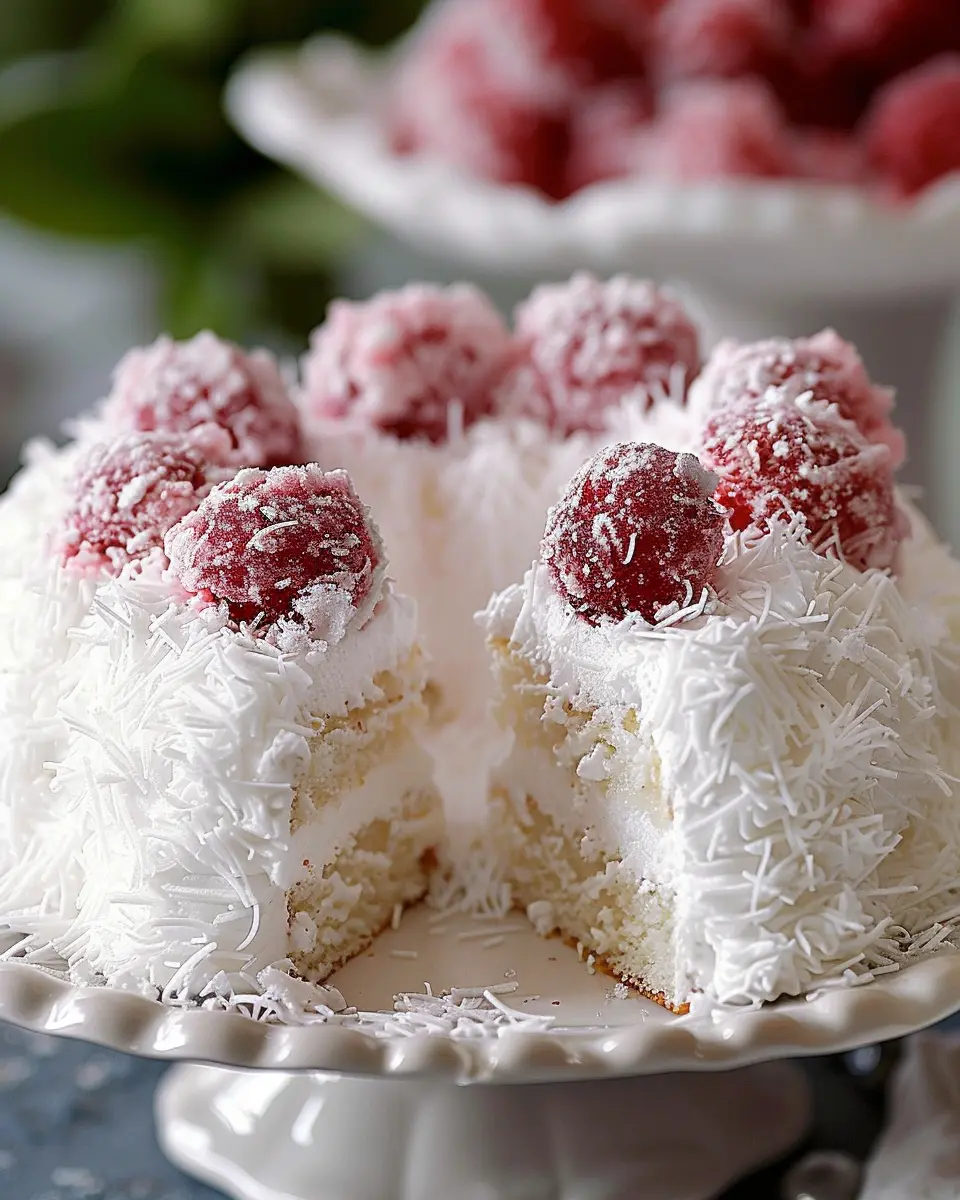
To achieve that eye-catching marble effect, pour half of the batter into your prepared cake pan, then dollop in generous spoonfuls of raspberry preserves. Use a knife or skewer to swirl the batter gently. Pour in the remaining batter on top and swirl again lightly—this is the fun part! The balance of cake and fruit preserves adds a delightful tartness to your sweet snowball cake.
Bake the Cake
Preheat your oven to 350°F (175°C) and pop your cake in for around 30 to 35 minutes. Keep an eye on it; cakes are tricky sometimes! You’ll know it’s done when a toothpick inserted in the center comes out clean.
Coat with Coconut and Cool
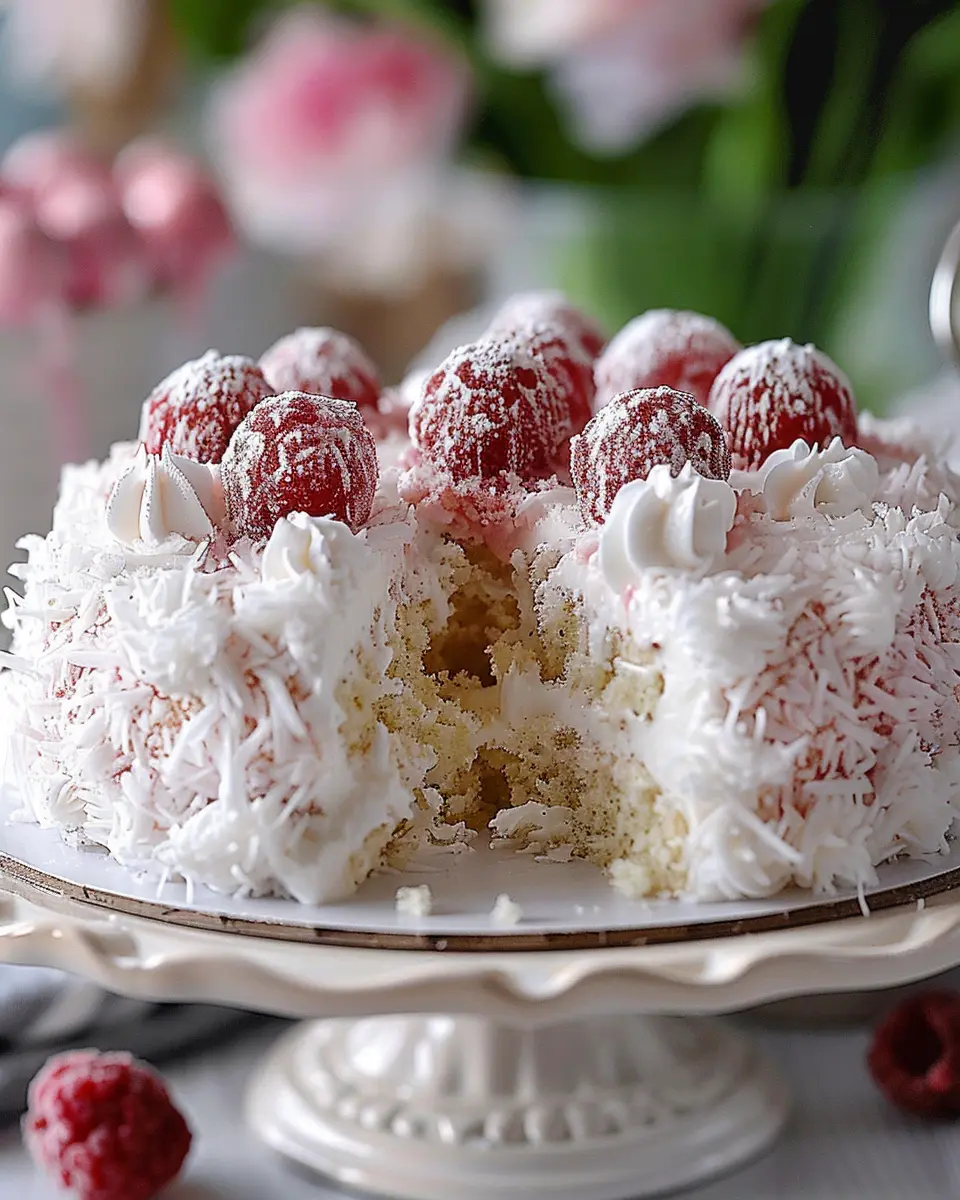
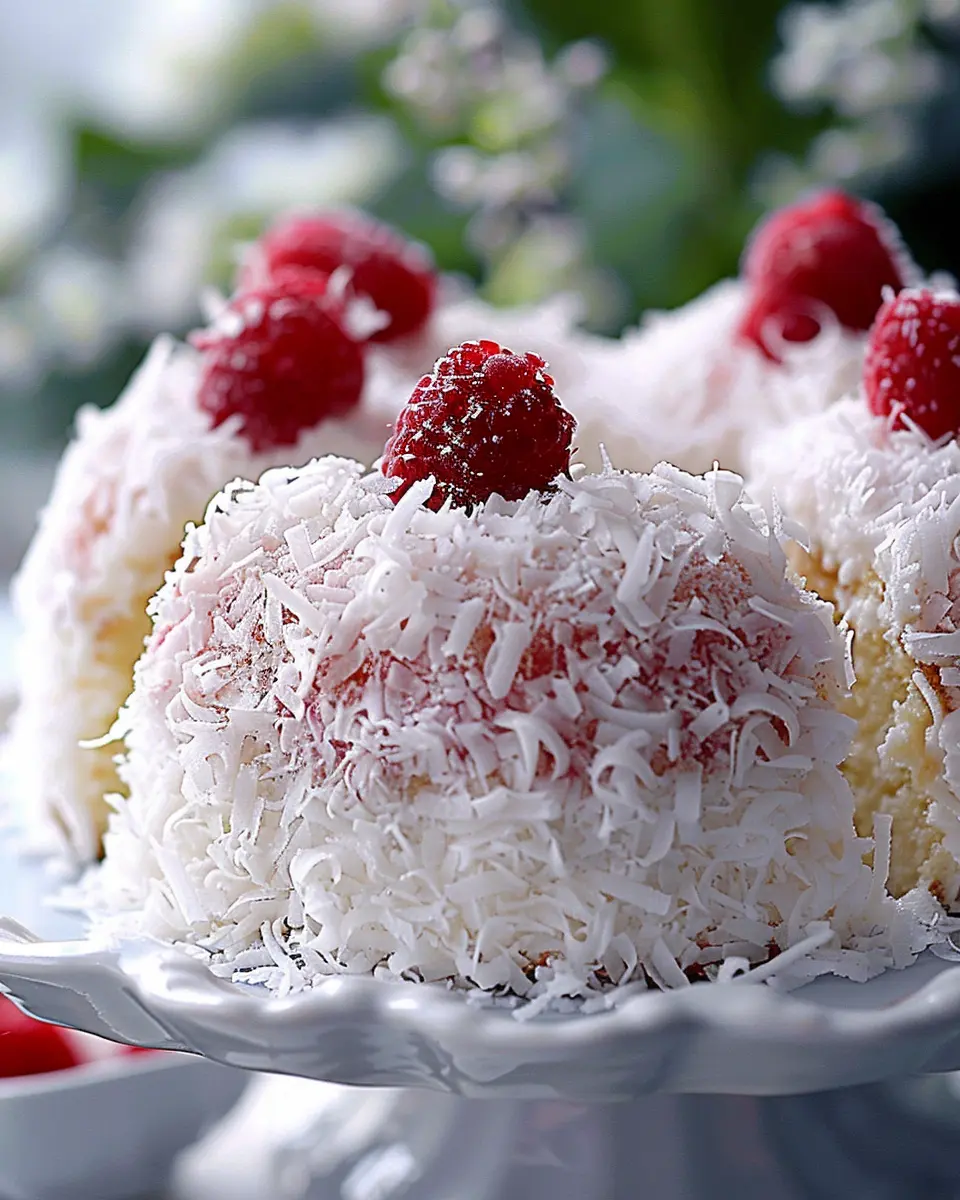
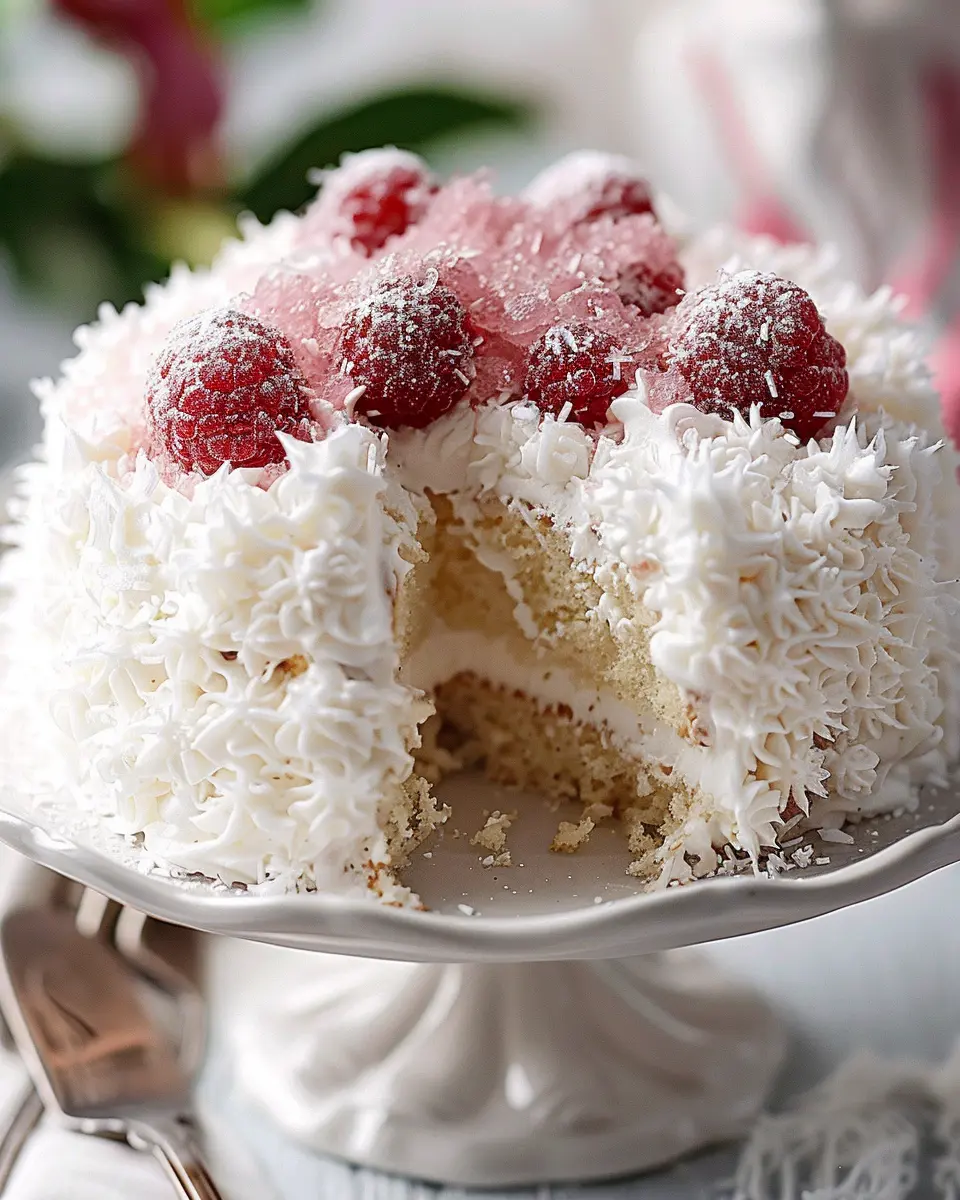
Once your cake has cooled for about 10 minutes, remove it from the pan and transfer it to a wire rack to cool completely. Afterward, it’s time for the crowning glory: the coconut! Coat the entire cake with flaked coconut to create that traditional snowball appearance.
Once you’ve followed these steps, you’ll have a stunning snowball cake! Nothing beats the moment you slice into this masterpiece and see the beautiful raspberry swirl inside. Don’t forget to share your creation with friends and family!
Variations on Snowball Cake
Snowball cake is a delightful treat, but why not mix it up a bit? Here are some creative variations that will take your cake to the next level while staying true to its fluffy essence.
Tropical Twist: Lime or Pineapple Preserves
Feeling adventurous? Swap out the traditional fillings for tropical flavors like lime or pineapple preserves. These zesty additions provide a refreshing contrast to the sweet cake, making it perfect for summer gatherings or when you’re just dreaming of a beach getaway. The sweetness of the cake mingles beautifully with the tangy preserves, offering a taste of paradise in every bite. For better options on tropical fillings, consider checking out Serious Eats.
Mini Snowball Cakes in Cupcake Form
If you’re looking for a fun twist for a party or an easy way to serve friends, consider making mini snowball cakes in cupcake form. Bake your favorite snowball cake recipe in cupcake liners, then frost them with your chosen filling. Not only do these bite-sized treats look adorable, but they also allow guests to enjoy these delightful cakes without the need for plates. Plus, who doesn’t love a good cupcake?
Chocolate or Berry Swirls for Added Flavor
Elevate your snowball cake by incorporating chocolate or berry swirls into the batter. Simply fold in melted chocolate or a berry puree before baking. This not only adds a visual appeal but also infuses delightful, unexpected flavors that will tantalize your taste buds. Imagine the joy of biting into a soft, fluffy cake and discovering a rich chocolate swirl or a burst of fresh berry!
By experimenting with these variations, your snowball cake can become a versatile treat for any occasion. So, which variation will you try first?
Baking notes for Snowball Cake
Tips to achieve the perfect swirl
Creating those gorgeous, fluffy swirls in your snowball cake can elevate its appearance from ordinary to extraordinary. Here are some handy tips:
- Temperature matters: Ensure your ingredients, especially eggs and butter, are at room temperature. This promotes better mixing and a lighter cake texture.
- Swirl technique: When mixing the batters, use a gentle folding motion instead of vigorous stirring. This helps maintain the airiness of the mixture, essential for that dreamy swirl effect.
Troubleshooting common baking issues
Even seasoned bakers face hiccups now and then. Here are some common challenges with your snowball cake and how to fix them:
- Dense texture: If your cake turns out heavier than expected, it could be due to overmixing or using too much flour. Always measure your flour accurately and avoid over-beating.
- Uneven baking: To combat uneven cooking, rotate your cake halfway through baking. An oven thermometer can also help ensure it’s heating accurately.
For more baking tips, check out America’s Test Kitchen for expert advice!
Serving suggestions for Snowball Cake
Complementary flavors for serving
When it comes to enhancing your snowball cake, think about pairing it with flavors that complement its sweet, coconut-rich profile. Fresh fruits like strawberries, raspberries, or mango add a burst of freshness and acidity that balances the dessert’s sweetness. A dollop of whipped cream or a scoop of vanilla ice cream can elevate the overall experience, providing a sumptuous creaminess. Drizzling with a light fruit coulis, like raspberry or passion fruit, not only looks stunning but adds an exciting layer of flavor.
Presentation ideas for gatherings
Let’s face it—the visual appeal of your snowball cake can make or break a gathering! Consider decorating the cake with shredded coconut, fresh fruit slices, or edible flowers for an elegant touch. A simple cake stand can elevate its status on your dessert table, while individual slices placed on decorative plates make serving effortless and chic. You can even create a themed dessert bar, complete with toppings like chocolate shavings or sprinkles, letting your guests customize their servings. For more inspiration, check out this article on the art of dessert presentation for an endless stream of ideas. Enjoy making your snowball cake the star of the show!
Time details for Snowball Cake
Preparation time
Before you dive into the delightful Snowball Cake experience, set aside about 20 minutes for preparation. This includes gathering your ingredients, greasing the cake pans, and mixing your batter. Getting everything ready in advance makes the process smoother and more enjoyable!
Baking time
Now, for the fun part—baking! You’ll need approximately 25 to 30 minutes for your cake to rise and turn that perfect golden brown. Remember, every oven is different, so keep an eye on it to avoid overbaking.
Total time
In total, expect to spend around 50 to 55 minutes from start to finish. This quick turnaround makes Snowball Cake a fantastic option for those spontaneous gatherings or just satisfying your sweet tooth. Once baked, let it cool, and you’ll be ready to frost and indulge! For safety tips on baking, check out FDA’s guidelines to ensure you’re creating delicious treats in a safe environment.
Nutritional Information for Snowball Cake
Calories and Key Nutritional Facts
Indulging in a slice of snowball cake might bring feelings of nostalgia, but it’s helpful to know what you’re munching on! Typically, a single serving (about 1/12 of a 9-inch cake) packs approximately 300-400 calories. Besides being a delightful treat, this cake usually contains around:
- Total Fat: 15g
- Saturated Fat: 9g
- Cholesterol: 50mg
- Sodium: 200mg
- Carbohydrates: 40g
- Sugars: 20g
- Protein: 4g
For more detailed information on nutrition, check out sources like USDA FoodData Central.
Healthier Substitutions to Consider
Want to enjoy your snowball cake while cutting back on some of the indulgences? Here are some simple swaps:
- Use Whole Wheat Flour: In place of all-purpose flour for added fiber.
- Swap Sugars: Try using honey or maple syrup instead of refined sugar.
- Replace Butter with Applesauce: This keeps your cake moist while reducing fat calories.
- Add Fresh Fruits: Incorporate blended fruit into the batter for natural sweetness and extra nutrients.
Making these tweaks not only brings a healthier spin to your dessert but can also boost its flavor! Would you try any of these substitutions in your next baking session?
FAQs about Snowball Cake
Can snowball cake be made in advance?
Absolutely! One of the best things about snowball cake is that it can be made ahead of time. In fact, preparing it a day or two in advance can actually enhance the flavors as they have time to meld together. Just make sure to refrigerate it after frosting, so it stays fresh. Need a sweet treat for your next gathering? This is your answer!
How to store leftover snowball cake?
Storing leftover snowball cake is quite simple. Here’s how to keep it fresh:
- In the Refrigerator: Place any leftover slices in an airtight container, or wrap the entire cake in plastic wrap. It will last for about 3–4 days in the fridge.
- In the Freezer: If you have more cake than you can eat, you can freeze it! Wrap individual slices in plastic wrap, then place them in a freezer-safe bag. This keeps it fresh for up to 3 months!
When you’re ready to enjoy those leftovers, just let them thaw in the fridge overnight.
Is there a gluten-free version of snowball cake?
Yes! You can easily make a gluten-free snowball cake by substituting traditional flour for a gluten-free blend. Look for options that contain xanthan gum, as it helps replicate the texture of standard flour. Check out resources like the Gluten-Free Society for more tips on baking gluten-free. With this modification, everyone can enjoy a slice of this delightful cake, regardless of dietary restrictions!
Conclusion on Snowball Cake
Why You Should Try Making Snowball Cake at Home
If you’re looking for a delightful addition to your dessert repertoire, snowball cake is a must-try! Not only is it visually stunning with its snowy coating of coconut, but it also brings a satisfying mix of flavors with each bite. The best part? You have total control over the ingredients, allowing you to customize it to your taste.
It’s a crowd-pleaser perfect for gatherings or a cozy night in. Plus, the joy of baking from scratch brings a sense of accomplishment that’s hard to beat. If you love indulging in creative desserts, give snowball cake a shot! Your friends and family will be begging for seconds. For more tips on creativity in the kitchen, check out sources like Food Network or Epicurious.
PrintSnowball Cake: The Best Indulgent Dessert for All Occasions
Indulge in the fluffy layers and sweet frosting of this delightful Snowball Cake, perfect for any celebration!
- Prep Time: 20 minutes
- Cook Time: 35 minutes
- Total Time: 55 minutes
- Yield: 12 servings 1x
- Category: Desserts
- Method: Baking
- Cuisine: American
- Diet: Vegetarian
Ingredients
- 2 cups all-purpose flour
- 1 ½ cups granulated sugar
- ½ cup unsweetened cocoa powder
- 1 teaspoon baking soda
- ½ teaspoon salt
- 1 cup buttermilk
- ½ cup vegetable oil
- 2 large eggs
- 2 teaspoons vanilla extract
- 1 cup boiling water
- 4 cups whipped cream
- ½ cup shredded coconut (optional)
Instructions
- Preheat your oven to 350°F (175°C) and grease two round cake pans.
- In a large bowl, combine flour, sugar, cocoa, baking soda, and salt.
- Add buttermilk, vegetable oil, eggs, and vanilla. Mix until smooth.
- Carefully stir in boiling water until combined.
- Pour batter into prepared pans and bake for 30-35 minutes.
- Cool cakes in pans for 10 minutes before transferring to wire racks to cool completely.
- Once cool, frost with whipped cream and decorate with coconut if desired.
Notes
- Ensure the cakes are completely cool before frosting to prevent melting.
- Use a serrated knife to level the tops of the cakes if needed.
Nutrition
- Serving Size: 1 slice
- Calories: 350
- Sugar: 30g
- Sodium: 250mg
- Fat: 15g
- Saturated Fat: 7g
- Unsaturated Fat: 5g
- Trans Fat: 0g
- Carbohydrates: 45g
- Fiber: 2g
- Protein: 4g
- Cholesterol: 50mg
Keywords: Snowball Cake, dessert, indulgent, birthday cake, celebration cake