Introduction to Snowball Cake Recipe
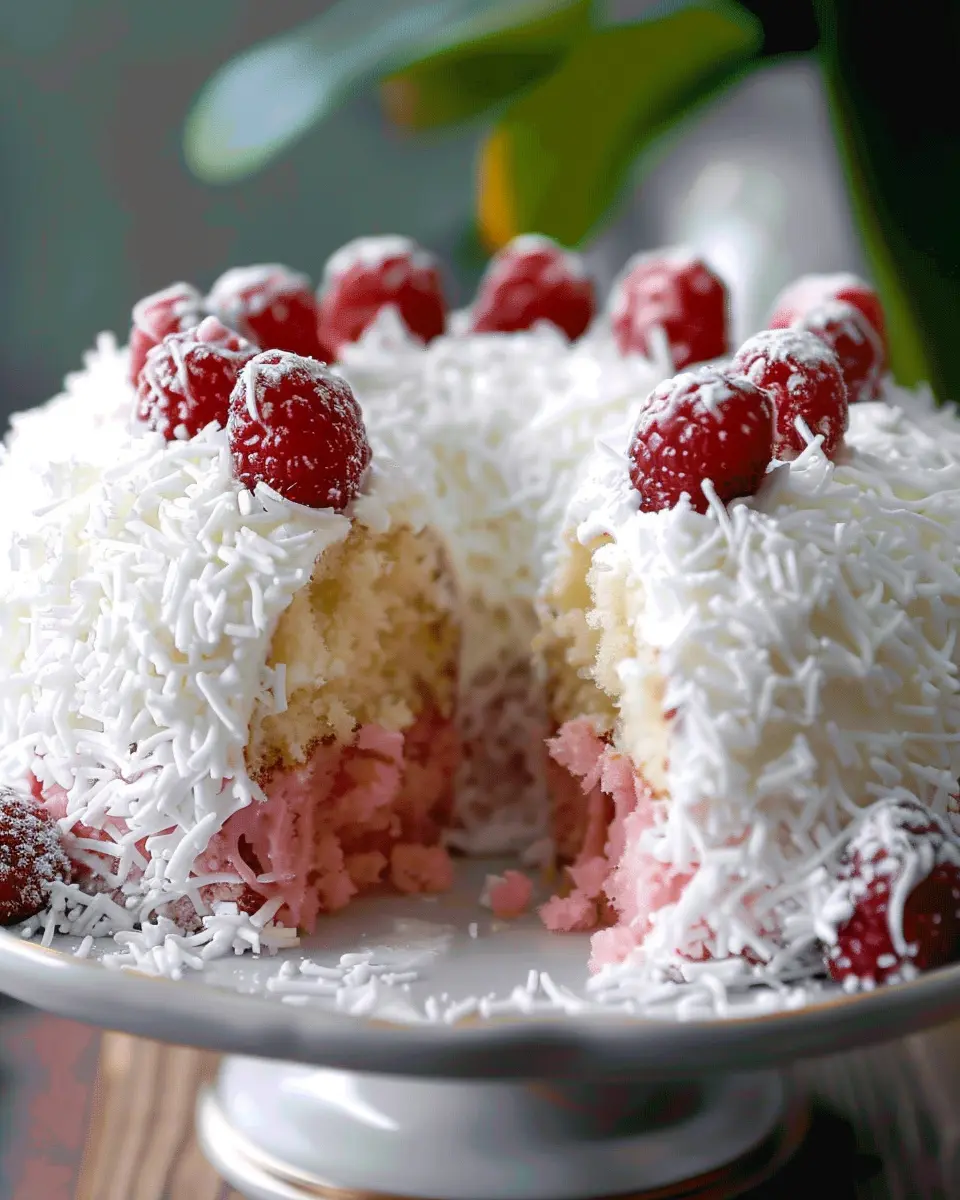
When it comes to desserts that are both visually stunning and utterly delicious, the Snowball Cake Recipe stands out as a favorite. Whether you’re celebrating a birthday, hosting a holiday gathering, or simply indulging a sweet craving, this cake is perfectly versatile for any occasion. But what makes it truly special?
Why Snowball Cake is the dessert for you
Imagine a cake that not only pleases the eye but also tantalizes your taste buds with layers of fluffy cake, rich frosting, and the delightful crunch of coconut. The Snowball Cake offers that and more. The cake is moist and airy, balanced beautifully with a creamy frosting that melts in your mouth.
This cake isn’t just about flavor; it’s about creating an experience. The snowy, fluffy appearance makes it an eye-catching centerpiece at any gathering. And trust me, once you bring this dessert to the table, you’ll instantly be the star of the show. You can find inspiration from top pastry chefs, such as those featured on Bon Appétit, who emphasize the importance of both flavor and presentation in baking.
Whether you’re a baking novice or someone who enjoys spending weekends in the kitchen, you’ll appreciate how relatively simple the Snowball Cake Recipe is. With just a few key ingredients—cakes, frosting, and coconut—you can create a dessert that feels elevated yet approachable. Plus, if you’re in a pinch for time, consider using store-bought cake layers and whipping up a quick frosting—no one will know the difference!
What’s more, this cake can be easily customized to fit your preferences. Want to incorporate lemon zest for a zesty kick or swap the coconut for another topping? Go for it! The freedom to personalize your Snowball Cake allows you to craft a dessert that reflects your own unique tastes, making it even more special.
In summary, the Snowball Cake Recipe not only satisfies a sweet tooth but also brings people together, creating lasting memories around the table. So, are you ready to impress your friends and family with this delightful treat? Let’s dive into the recipe!

Ingredients for Snowball Cake
Essential ingredients for a successful cake
Creating the perfect Snowball Cake begins with selecting the right ingredients. This delectable dessert stands out for its fluffy layers and delightful flavor, making it a favorite for gatherings. Here’s what you’ll need to get started:
- All-purpose flour: The foundation of your cake, providing structure.
- Granulated sugar: Adds sweetness and contributes to that coveted moist texture.
- Unsalted butter: Essential for richness; ensure it’s at room temperature for easy mixing.
- Eggs: Bind the ingredients together while adding moisture.
- Baking powder: This is your key leavening agent that helps the cake rise beautifully.
- Milk: Incorporates moisture; consider using whole or 2% for creaminess.
- Vanilla extract: Enhances the flavor profile of the cake (and who doesn’t love that scrumptious aroma?).
- Powdered sugar: For that snowy white finish, enveloping your cake in sweetness.
With these ingredients in hand, you’re one step closer to a delightful Snowball Cake experience. For a touch of creative flair, consider adding ingredients like coconut or chocolate for variation. Interested in more tips? Check out this detailed baking guide for further inspiration!
Step-by-Step Preparation for Snowball Cake
Baking can be incredibly rewarding, especially when you dive into a delightful project like a Snowball Cake. This fluffy, cloud-like cake is perfect for any occasion. Let’s walk through the preparation together, step by step, so you can create your very own masterpiece.
Gather Your Ingredients
Before diving in, ensure you have all your ingredients at the ready. Using fresh components makes a world of difference in flavor and texture. Here’s what you need for your Snowball Cake Recipe:
-
For the cake:
-
2 cups of all-purpose flour
-
1 ½ cups of granulated sugar
-
½ cup of unsalted butter, softened
-
1 cup of milk
-
3 large eggs
-
1 tablespoon of baking powder
-
1 teaspoon of vanilla extract
-
A pinch of salt
-
For the frosting:
-
4 cups of powdered sugar
-
1 ½ cups of shredded coconut
-
½ cup of unsalted butter, softened
-
2-4 tablespoons of milk (to reach desired consistency)
Pro tip: Checking your pantry before you shop can prevent any last-minute dashes to the store!
Preheat and Prepare the Pan
Next, preheat your oven to 350°F (175°C). While it’s heating, prepare your cake pans. Grease two 9-inch round cake pans with butter or non-stick spray, then lightly dust them with flour. This step ensures your cakes come out smoothly without sticking to the sides. If you want to get a bit fancy, consider lining the bottoms with parchment paper!
A well-prepared pan really makes a difference. As someone who has had their fair share of cake disasters, trust me on this!
Whisk and Cream Your Ingredients
In a large mixing bowl, start by creaming together the butter and sugar until you achieve a light, fluffy consistency. This aeration process is key for light and fluffy cakes. Now, add your eggs one at a time, mixing well after each addition. Then stir in the vanilla extract.
In a separate bowl, whisk together the flour, baking powder, and salt. Gradually add this dry mixture to your butter-sugar-egg concoction, alternating with the milk, starting and ending with the flour mixture. This back-and-forth technique prevents lumps and creates a beautifully mixed batter.
If you’re wondering about the science behind baking, you can explore more about it at Serious Eats.
Layer and Swirl the Batter
Divide and pour your batter evenly between the two prepared pans. To create a lovely swirl effect for added visual appeal, you can use a knife or skewer. Just gently drag it through the batter in a figure-eight motion. This little step adds a professional touch!
Have fun with this part—imagine what flavors you want to pair with your cake. You might even consider adding spices like cinnamon or a splash of almond extract for a twist!
Bake the Cake to Perfection
Slide your pans into the preheated oven and set a timer for 25-30 minutes. You’ll know it’s ready when a toothpick inserted in the center comes out clean.
Once baked, remove the cakes from the oven and let them cool in the pans for about 10 minutes. Then, transfer them to a wire rack to cool completely. Trust me, patience is key here; you don’t want your frosting to melt into a gooey mess!
As you prepare the frosting, this is where the fun begins. Feel free to explore frosting techniques or even additional decorations like chocolate shavings or fresh fruit.
In wrapping up this step of the Snowball Cake Recipe, remember: the process can be just as enjoyable as the end result. So take a moment to appreciate the aromas filling your kitchen!
Happy baking!

Variations on Snowball Cake
When it comes to the classic Snowball Cake Recipe, there’s a world of delicious possibilities waiting to be explored. Let’s dive into some creative variations that keep your baking fresh and exciting!
Tropical Twist with Pineapple Preserves
Imagine biting into a slice of Snowball Cake with a burst of tropical delight! Incorporating pineapple preserves into your recipe can transport your taste buds straight to the beach. Simply layer the preserves between your cake layers for a sweet, tangy contrast to your fluffy cake. For an added touch, consider topping your cake with toasted coconut flakes for that extra tropical vibe. Feel free to check out this pineapple guide to learn more about selecting the best preserves.
Exploring Different Flavor Combinations with Fruit Preserves
Why stop at pineapple? The beauty of a Snowball Cake Recipe is its versatility. Here are some delightful fruit preserve combinations to consider:
- Raspberry: A sweet and tart option that pairs wonderfully with chocolate layers.
- Peach: Offers a fragrant, juicy taste that complements almond-flavored cakes beautifully.
- Strawberry: A classic choice, bringing summer freshness in every bite.
Need inspiration? Look for high-quality fruit preserves at your local store, or make your own for a personal touch. Choosing fresh, seasonal fruits can elevate your cake to another level. Have you experimented with savory preserves like fig or apricot? The savory-sweet balance can create an unforgettable dessert experience. Feel free to share your favorite combos in the comments!
Each variation can lead to a memorable cake that excites your guests and keeps them guessing what’s next. The Snowball Cake is more than just a dessert; it’s a canvas for your creativity!
Cooking Tips and Notes for Snowball Cake
Avoiding Common Baking Pitfalls
Baking can be tricky, especially when it comes to creating a delightful Snowball Cake. To ensure you achieve that perfect fluffiness, make sure your ingredients are at room temperature before mixing. This allows for better incorporation of air, which leads to a lighter cake texture. Additionally, measure your flour correctly — spoon it into your measuring cup and level it off with a knife, rather than scooping directly from the bag. This little tip can make a huge difference!
Making Mini Snowball Cakes
Feeling adventurous? Why not transform your Snowball Cake Recipe into adorable mini versions? Simply use a muffin tin or a mini cake pan! This not only shortens the baking time but also makes for a perfect bite-sized treat at parties. Just be sure to adjust your baking time, checking for doneness a bit earlier to avoid overbaking.
Whether you’re celebrating a special occasion or just indulging, these tips will help you enjoy a scrumptious Snowball Cake every time! For further insights on baking, you might find King Arthur Baking a good resource to explore.

Serving Suggestions for Snowball Cake
When it comes to enjoying your Snowball Cake, think beyond the basic slice. Elevating your dessert experience can be as simple as pairing it with delightful accompaniments.
Pairing with Fresh Fruits or Whipped Cream
For an extra burst of flavor, serve your Snowball Cake alongside a medley of fresh fruits. Strawberries, blueberries, and raspberries not only add a beautiful contrast but also bring a refreshing zest that balances the sweetness of the cake. A dollop of homemade whipped cream can further enhance this pairing, creating a delightful creaminess that harmonizes perfectly with the cake’s light texture. If you want to level up your whipped cream game, consider adding a touch of vanilla extract or a sprinkle of powdered sugar for added sweetness.
Presentation Ideas for Gatherings
When it comes to hosting, the presentation of your Snowball Cake can be just as important as its taste. Consider placing the cake on a decorative cake stand for a chic focal point. Garnish the top with colorful fruits, a dusting of powdered sugar, or even a drizzle of chocolate sauce to create an inviting visual appeal. You might also incorporate themed plates or utensils that enhance your gathering’s atmosphere. Not only does this make a statement, but it also encourages that ‘wow’ factor when serving your guests.
With these serving suggestions, you’ll transform your Snowball Cake Recipe from a simple dessert into a delightful centerpiece that’s sure to impress! For more dessert ideas and creativity, check out resources like Epicurious and Food52 for fabulous tips!
Time Breakdown for Snowball Cake
Preparation time
Getting your Snowball Cake ready begins with about 20 minutes of prep work. This is when you’ll gather your ingredients, mix your batter, and prep your baking pans. It’s a breeze if you organize everything beforehand!
Baking time
Next up is the baking! The cake typically takes about 25-30 minutes in the oven. Keep an eye on it; you’ll want to pull it out when a toothpick comes out clean. Perfection is key here!
Total time
In total, plan for about 1 hour, including preparation and baking. This delightful cake is worth every minute, making it perfect for gatherings or just treating yourself. Looking for more desserts? Check out our other easy cake recipes here.
When diving into this Snowball Cake Recipe, you’ll find it a delightful balance of fluffy cake and rich frosting, sure to impress your friends and family!
Nutritional Facts for Snowball Cake
Snowball Cake is a delightful treat, but how does it measure up nutritionally? Let’s break it down!
Calories per slice
Each slice of this indulgent Snowball Cake typically contains about 350 calories. While it’s a delicious addition to any dessert table, enjoying it in moderation is key.
Sugar content
Sweetened to perfection, a slice holds around 30 grams of sugar. If you’re conscious about sugar intake, consider satisfying your cravings by pairing it with fresh berries, which can add natural sweetness and nutrition.
Protein information
This cake offers a modest protein content, roughly 4 grams per slice. To boost the protein level, you might consider adding a scoop of Greek yogurt on the side. It’s a tasty way to get more from your dessert while enjoying the flavors from the Snowball Cake recipe.
If you’re curious about making healthier choices or swapping out ingredients for a lighter version, the USDA has some useful resources you can check out here: USDA FoodData Central.
FAQs about Snowball Cake
Can I substitute ingredients in this Snowball Cake recipe?
Absolutely! One of the joys of baking is making a recipe your own. For this Snowball Cake, you can easily substitute some ingredients. If you’re looking for a gluten-free option, consider using almond flour or a gluten-free baking mix. If you want a healthier twist, you can replace regular butter with coconut oil or Greek yogurt. Also, feel free to swap the frosting—using whipped cream instead of buttercream can lighten it up a bit. The key is to keep the essence of the cake while tailoring it to your tastes and dietary needs.
How do I store leftover cake?
Storing your leftover Snowball Cake properly will keep it fresh and delicious for days. First, make sure the cake is completely cooled before storage. You can wrap it in plastic wrap or aluminum foil to prevent it from drying out. Alternatively, store it in an airtight container. If you made a large batch, consider cutting it into slices before storing, so you can grab a piece easily.
What’s the best way to reheat this cake?
If you want to indulge in a warm slice of Snowball Cake, reheating it is totally doable! Preheat your oven to 350°F (175°C) and place the slice on a baking sheet. Warm it for about 10-15 minutes, or until it’s heated through. If you’re short on time, you can also microwave a slice for about 20-30 seconds. Just be careful not to overheat it, as this can dry it out.
Baking can be an adventure, and with these tips, you’re on your way to mastering the Snowball Cake Recipe. For more insights into storing and enjoying your desserts, check out this guide on food storage for expert advice!
Conclusion on Snowball Cake Recipe
Baking your own Snowball Cake is not just a delightful experience but also a fantastic way to impress friends and family. Why should you consider this? Well, creating a homemade cake allows for customization—you can tweak flavors and decorations according to your taste. Plus, the satisfaction of pulling out a stunning, fluffy cake from the oven is unparalleled.
Did you know that making cakes from scratch can help you develop essential baking skills? It’s an enjoyable way to unwind after a busy day and can be a creative outlet. So, gather your ingredients, roll up your sleeves, and give this Snowball Cake Recipe a try! You won’t regret it.
If you’re looking for more baking inspiration, check out BBC Good Food for more delicious cake ideas!
PrintSnowball Cake Recipe: Indulgent Delight for Every Celebration

A deliciously indulgent snowball cake perfect for any celebration. Soft, fluffy, and visually stunning!
- Prep Time: 20 minutes
- Cook Time: 35 minutes
- Total Time: 55 minutes
- Yield: 8 servings 1x
- Category: Dessert
- Method: Baking
- Cuisine: American
- Diet: Vegetarian
Ingredients
- 2 cups all-purpose flour
- 1 ½ cups granulated sugar
- ½ cup unsweetened cocoa powder
- 1 cup butter, softened
- 4 large eggs
- 1 cup milk
- 2 teaspoons vanilla extract
- 1 teaspoon baking powder
Instructions
- Preheat your oven to 350°F (175°C).
- In a bowl, cream the butter and sugar until light and fluffy.
- Add eggs one at a time, mixing well after each addition.
- Combine the dry ingredients in another bowl and gradually add to the wet mixture.
- Stir in milk and vanilla until just combined.
- Pour the batter into prepared cake pans and bake for 30-35 minutes.
- Allow the cakes to cool before frosting.
Notes
- For a richer flavor, add a tablespoon of espresso powder.
- Decorate with shredded coconut for a snowball effect.
Nutrition
- Serving Size: 1 slice
- Calories: 350
- Sugar: 25g
- Sodium: 200mg
- Fat: 18g
- Saturated Fat: 10g
- Unsaturated Fat: 7g
- Trans Fat: 0g
- Carbohydrates: 45g
- Fiber: 2g
- Protein: 5g
- Cholesterol: 85mg
Keywords: Snowball Cake Recipe, Cake, Dessert, Celebration