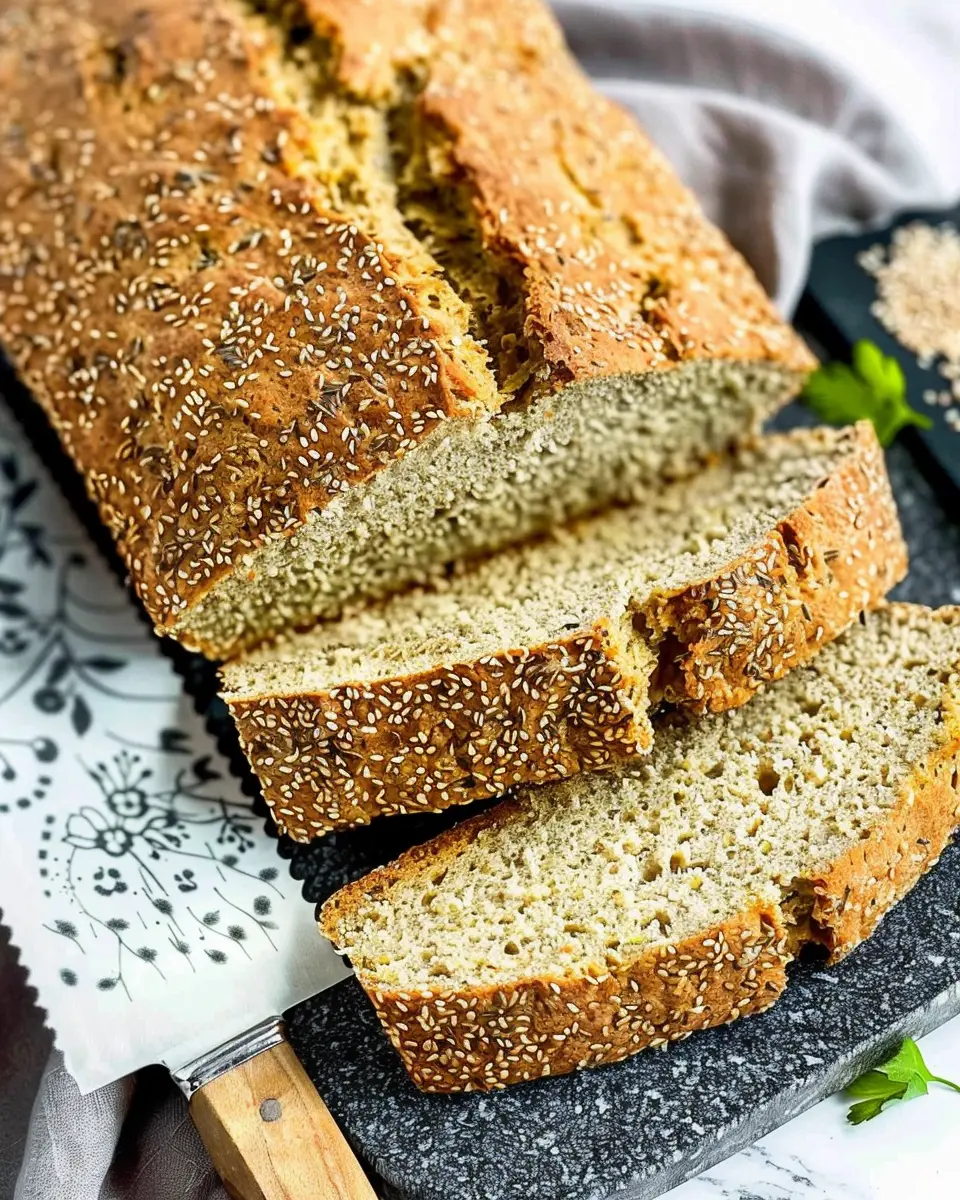
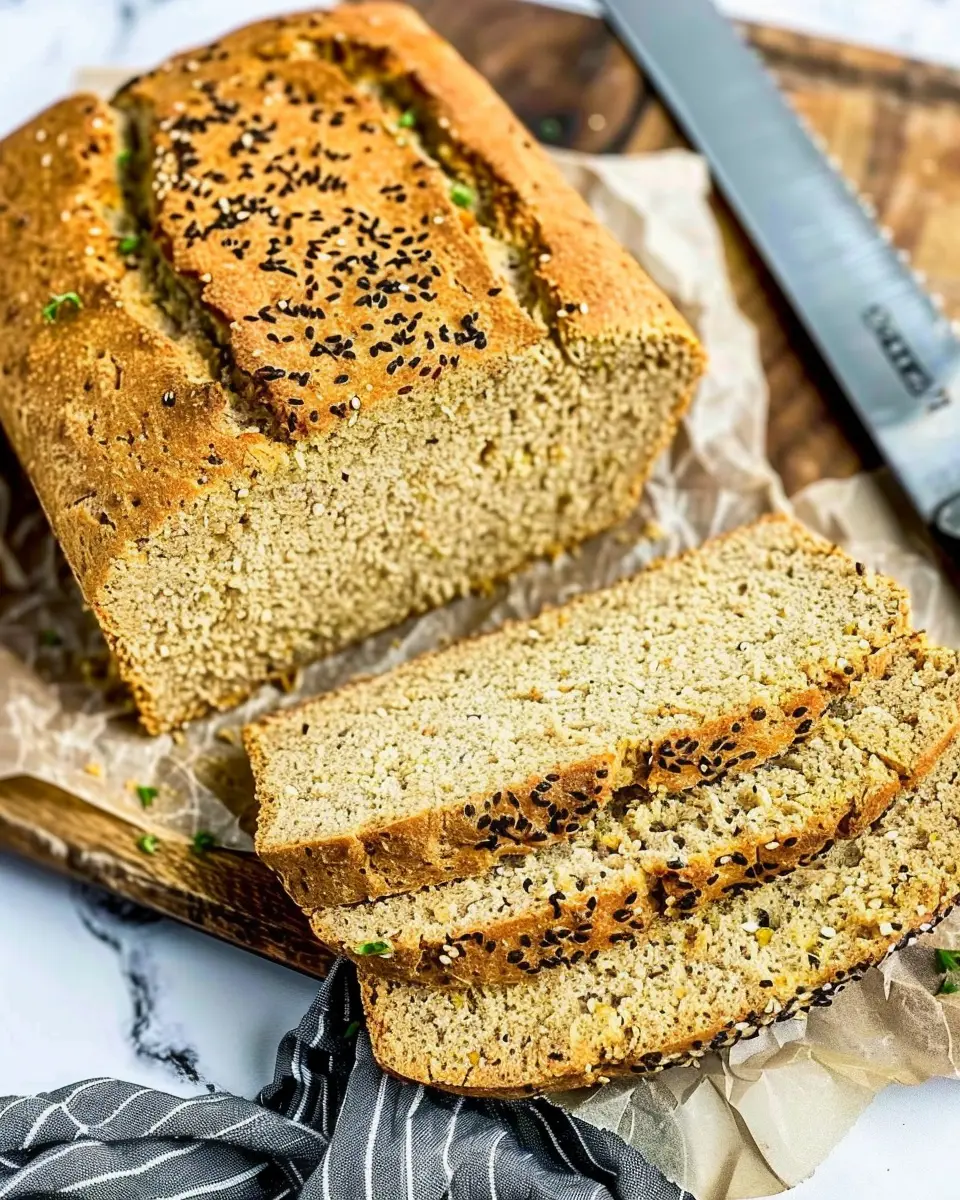
Introduction to Chickpea Flour Protein Bread
Are you looking for a delicious, nutritious alternative to traditional bread? Look no further! Chickpea flour protein bread is here to invigorate your meals with its unique flavor and impressive health benefits. Whether you’re gluten-free, vegan, or simply chasing more protein in your diet, this bread is an excellent choice.
Why Choose Chickpea Flour Protein Bread?
Chickpea flour, made from ground chickpeas, is a nutritional powerhouse. It’s packed with protein—offering about 21 grams per cup—which is fantastic for anyone looking to fuel their bodies with plant-based energy. That’s right! You can enjoy a slice of homemade bread that not only tantalizes your taste buds but also provides essential amino acids vital for muscle repair and growth.
Moreover, chickpea flour is rich in fiber, which helps with digestion and keeps you feeling fuller for longer. This can be particularly beneficial for young professionals juggling busy schedules and trying to maintain a healthy diet. Health experts often suggest incorporating more whole foods, and chickpeas fit the bill perfectly. You can explore a plethora of recipes to utilize this ingredient, from salads to soups, but making it the star of your bread is an excellent way to enjoy its benefits daily.
But let’s get practical. Have you ever had bread that was heavy and dense? Chickpea flour protein bread strikes the right balance, yielding a delightful texture that’s neither too light nor excessively compact. Plus, it’s incredibly versatile! You can enjoy it as a base for sandwiches, toast it for breakfast with a smear of avocado, or slice it up for a hearty side at dinner.
If you’re curious about more recipes or the health benefits of chickpeas, websites like Healthline offer extensive insights into their nutritional profile. Whether it’s for a quick snack or a part of a meal prep for the week, incorporating chickpea flour protein bread can make your diet not just healthier but also more exciting.
In the following sections, we’ll dive into crafting your very own chickpea flour protein bread that’s sure to impress—both for its taste and potential health benefits!
Ingredients for Chickpea Flour Protein Bread
Essential ingredients for a healthy loaf
Creating your chickpea flour protein bread starts with a few simple, wholesome ingredients that pack a nutritional punch. Here’s what you’ll need:
- Chickpea flour: The star of the show, it’s gluten-free and rich in protein and fiber, making it an excellent choice for a healthy diet.
- Ground flaxseed: Acts as a binding agent, plus it adds omega-3 fatty acids.
- Baking powder: This helps your bread rise, giving it a light and airy texture.
- Salt: For flavor. Don’t skip it! A pinch can elevate your bread significantly.
- Warm water: Hydrates the flour and helps activate the ingredients.
This combination creates a fantastic base for your chickpea flour protein bread.
Optional ingredients for added flavor
Want to kick your bread up a notch? Consider adding some of these flavor enhancers:
- Herbs and spices: Think rosemary, garlic powder, or cumin for an aromatic twist.
- Nuts and seeds: Toasted sunflower seeds or walnuts add crunch and extra nutrients.
- Dried fruits: A handful of sundried tomatoes or olives can bring a Mediterranean zing!
Feel free to experiment with these optional ingredients to personalize your chickpea flour protein bread. The possibilities are endless!
Preparing Chickpea Flour Protein Bread
Homemade bread has a special way of making a house feel like a home, doesn’t it? When you combine it with the nutritional powerhouse of chickpeas, you’ve got a delicious and healthy treat on your hands. Let’s dive into the steps to prepare a delightful chickpea flour protein bread that will keep your energy up throughout the day.
Gather Your Equipment
Before you start mixing ingredients, it’s essential to have all your kitchen tools ready. Having everything within arm’s reach will make the baking process smoother and more enjoyable. Here’s what you’ll need:
- Mixing bowls (preferably a large one and a smaller one)
- Measuring cups and spoons
- Whisk or fork
- Baking pan (loaf pan recommended)
- Parchment paper (optional)
- Cooling rack
While you’re getting your equipment, you might want to put on some upbeat music to get in the mood for baking!
Prepare the Baking Pan
Ready to get started? First things first, make sure your baking pan is prepped. If you’re using a metal loaf pan, lightly grease it with olive oil or line it with parchment paper for easier removal. This will ensure your chickpea flour protein bread slides right out without any fuss. A clean bake means a happy baker, right?
Mix the Dry Ingredients
In a large mixing bowl, combine the dry ingredients to set a solid foundation for your bread. You’ll typically need:
- 1 cup of chickpea flour
- 1 cup of all-purpose flour (or a gluten-free alternative)
- 1 teaspoon of baking powder
- 1/2 teaspoon of baking soda
- Salt to taste (about 1/2 teaspoon)
Whisk these together until they’re evenly distributed. This step is crucial because it ensures that your plant-based protein bread rises uniformly, giving you that perfect texture.
Blend the Wet Ingredients
Now, let’s move on to the wet ingredients. In a separate bowl, combine:
- 1 cup of warm water (not boiling)
- 2 tablespoons of olive oil
- 2 tablespoons of honey or maple syrup (for a natural sweetness)
You can also add flavor boosters like finely diced herbs or spices if you’re feeling adventurous! Whisk until well mixed – this is where the magic happens.
Combine the Mixtures
Pour your blended wet ingredients into the bowl with the dry ingredients. Using a spatula or wooden spoon, gently fold the mixtures together. Be careful not to overmix; you want just enough mixing to ensure everything is well combined. The dough should be thick yet moldable.
Spread the Dough in the Pan
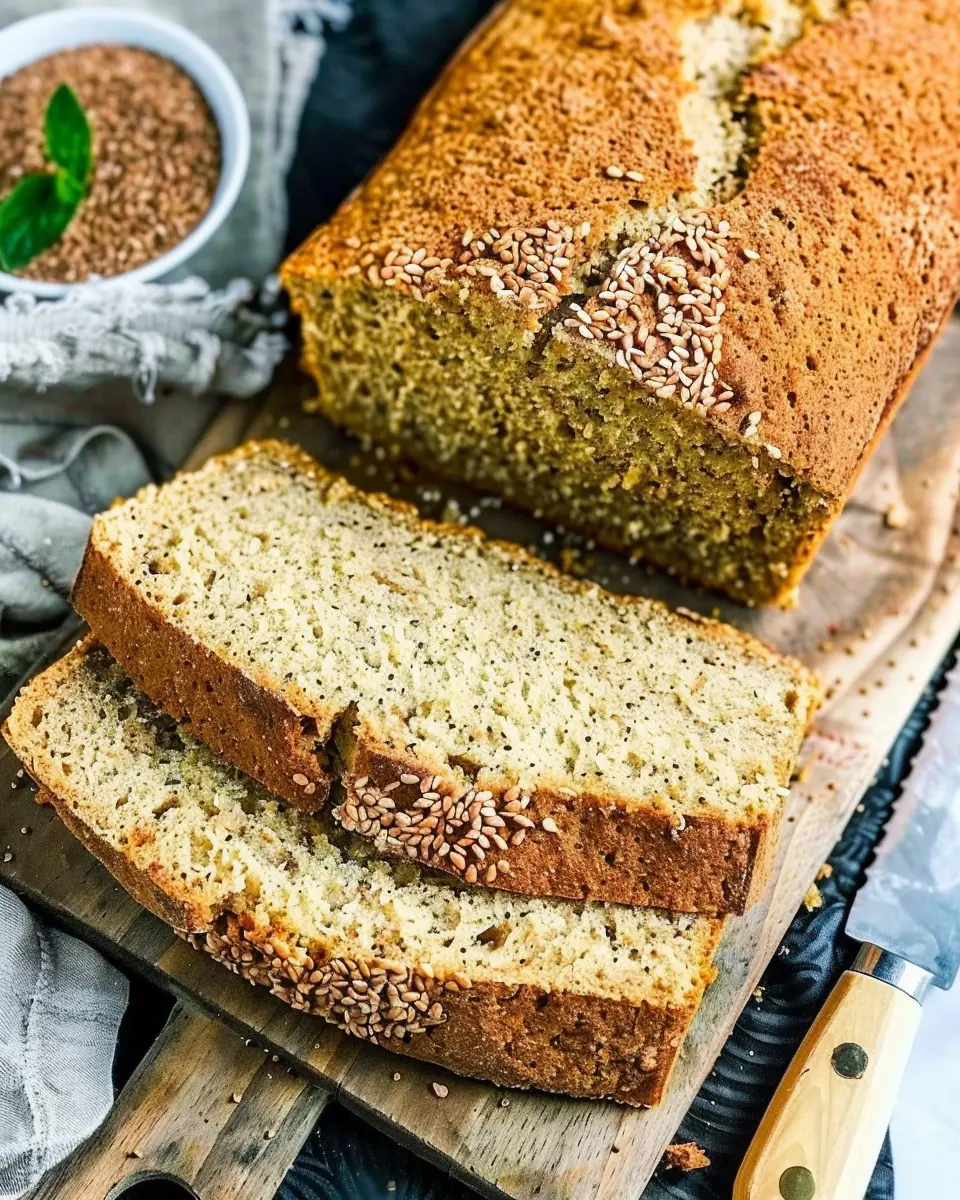
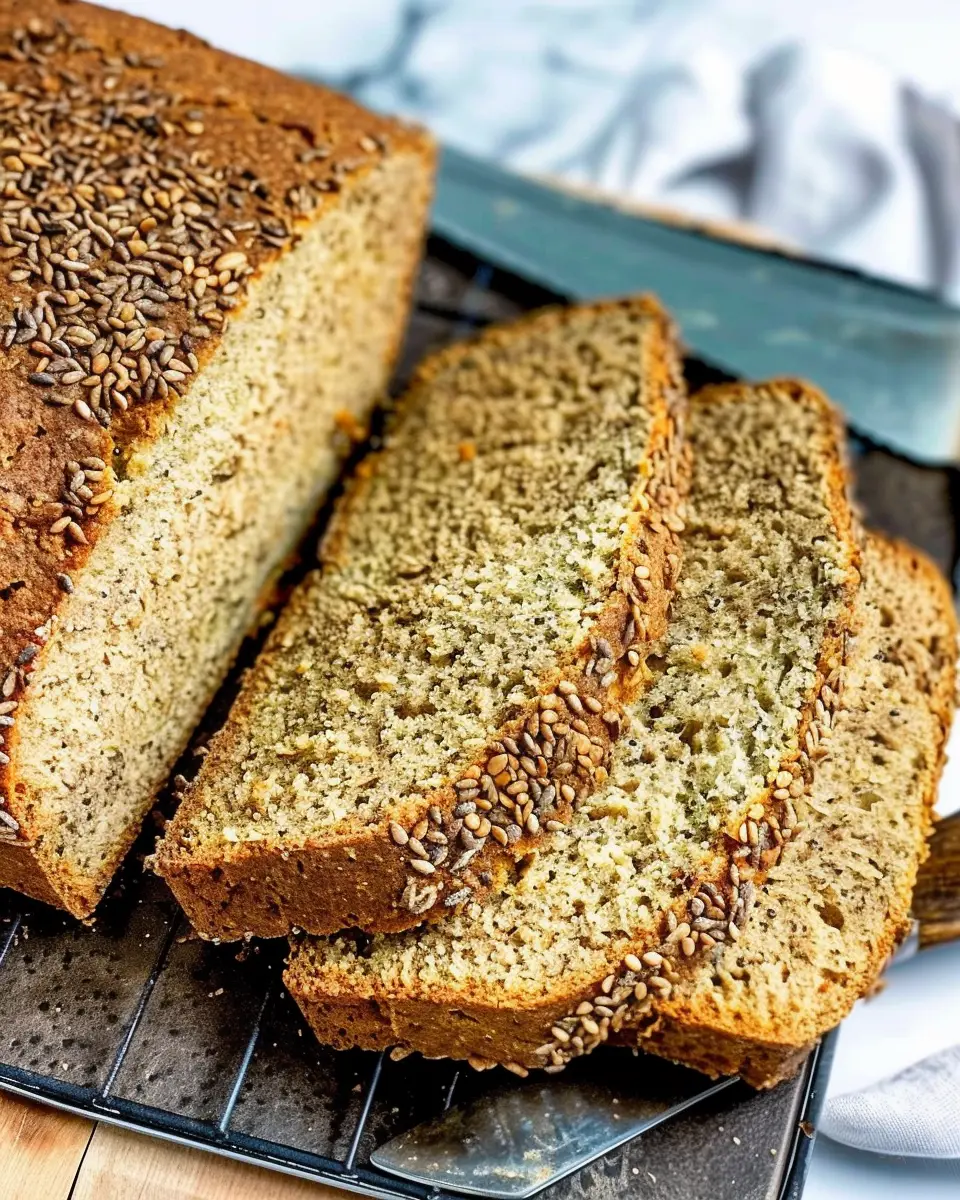
Next, transfer the dough into your prepared loaf pan. Use the spatula to smooth the top for an even finish. If desired, sprinkle some seeds or nuts on top for an added crunch and visual appeal. This simple step can elevate your chickpea flour protein bread from good to spectacular!
Bake to Perfection
Preheat your oven to 350°F (175°C), and once it’s ready, pop your pan inside. Allow it to bake for about 30-35 minutes, or until you see a golden crust and it springs back when lightly pressed. The aroma of freshly baked bread will soon fill your kitchen—prepare for some serious appetites!
Cool Before Slicing
Once baked, remove the bread from the oven and let it cool in the pan for about 10 minutes. Then, transfer it to a cooling rack to cool completely. This step is crucial; slicing bread too soon can result in a gummy texture. Trust me, you want to let it set for those perfect slices later.
As you enjoy a slice of your homemade chickpea flour protein bread, don’t forget to think about the incredible nutrition it offers. Packed with plant-based protein and fiber, it’s perfect for a nutritious breakfast or a post-workout snack.
There you have it, a simple yet effective way to whip up your own delicious chickpea flour protein bread. It’s a rewarding experience that’s well worth the effort! Need tips or alternatives? Check out sources like Healthline for more about chickpeas, or Serious Eats for general baking advice. Happy baking!
Variations on Chickpea Flour Protein Bread
Chickpea flour protein bread is a fantastic, plant-based option for those looking to boost their protein intake while enjoying something delicious. But why stick to just one variation? Here are some fun twists you can try.
Herb-infused Chickpea Flour Protein Bread
Adding fresh or dried herbs to your chickpea flour protein bread can elevate its flavor profile wonderfully. Mix in ingredients like:
- Rosemary
- Thyme
- Oregano
Simply incorporate about 1-2 tablespoons of your favorite herb into the batter before baking. This aromatic touch will give your bread a savory edge, perfect for pairing with soups or salads.
Seedy Chickpea Flour Protein Bread
For an extra crunch and nutritional boost, why not go seedy? Toss in a mix of seeds such as:
- Chia seeds
- Flaxseeds
- Pumpkin seeds
A handful of seeds not only enhances the texture but also adds omega-3 fatty acids and fiber. Simply sprinkle some seeds on top before baking or fold them into the batter for a heartier loaf.
Sweet Variations for Breakfast or Snacks
Chickpea flour protein bread isn’t just savory; it can be sweet, too! For breakfast or an afternoon snack, consider adding:
- Mashed bananas for natural sweetness
- A dash of cinnamon
- Chopped nuts or dark chocolate chips
Sweetening your bread gives it a delightful character that pairs well with nut butter or yogurt. Plus, making these variations allows you to enjoy chickpea flour protein bread in multiple ways throughout the week.
Incorporate these variations to keep your bread exciting and adjust them according to your taste preferences. Let your creativity shine as you explore the world of chickpea flour! If you want to learn more about chickpea flour’s benefits or find recipe inspiration, check out sources like the Whole Grains Council or Healthline.
Cooking notes for Chickpea Flour Protein Bread
Tips for achieving the best texture
When making chickpea flour protein bread, achieving that perfect, airy texture is key. Here are some essential tips:
- Use a mix of flours: Consider combining chickpea flour with almond or oat flour to enhance texture and flavor.
- Hydrate properly: Let your batter rest for about 20-30 minutes. This helps the chickpea flour absorb moisture effectively, resulting in a lighter bread.
- Don’t skip the leavening agent: Baking powder or baking soda can make a significant difference. Just a teaspoon can add lift and make your bread wonderfully fluffy.
Common pitfalls to avoid
While creating delicious chickpea flour protein bread, be mindful of these common mistakes:
- Too much water: Adding excess liquid can lead to a dense loaf. Start with less, and gradually add more if needed.
- Overmixing: Mix just until combined. Overmixing can make the bread tough instead of tender.
- Not checking for doneness: Use a toothpick—if it comes out clean, your bread is ready to enjoy!
For more baking tips, consider checking out resources from expert bakers at sites like King Arthur Baking. Happy baking!
Serving suggestions for Chickpea Flour Protein Bread
Pairing with spreads and toppings
The versatility of chickpea flour protein bread shines when it comes to toppings and spreads. Start simple: a layer of creamy hummus is a classic choice that brings out the nutty flavor of chickpea flour. For something sweeter, try almond butter or a fruit spread, which can contrast beautifully with the dense texture of the bread. Want a savory twist? Top it with sliced turkey bacon and avocado for a filling brunch option, or layer it with chicken ham and fresh herbs for a delightful lunch sandwich.
Creative uses for leftover bread
If you find yourself with leftover chickpea flour protein bread, don’t let it go to waste! Consider turning it into croutons or breadcrumbs—just cube the bread, toss with olive oil and spices, and bake until crispy. These add a protein-packed crunch to salads or soups. You can also use it to make a savory bread pudding or a breakfast strata by layering with eggs and veggies for an easy, satisfying dish. Explore more ideas through this great resource for creative ways to enjoy your leftover bread!
Time details for Chickpea Flour Protein Bread
Preparation time
Getting started on your chickpea flour protein bread is a breeze! You’ll need around 10-15 minutes to gather your ingredients and whip up the batter. Don’t rush this stage; it’s where you infuse your personal touch. Maybe add some herbs or spices that speak to your palate!
Baking time
Once your batter is ready and in the oven, it’s time to relax. The baking process will typically take about 25-30 minutes. This is the perfect moment to tidy up your kitchen or check out some delicious serving suggestions online!
Total time
In total, you’re looking at approximately 35-45 minutes from start to finish. So, in less than an hour, you can enjoy warm, homemade chickpea flour protein bread. Imagine the satisfaction of slicing into a loaf that you made yourself! If you’re curious about variations and healthy toppings, consider checking out resources like Healthline for inspiration.
Nutritional Information for Chickpea Flour Protein Bread
If you’re curious about the health benefits of Chickpea Flour Protein Bread, you’re in for a treat! Let’s break it down:
Calories
One slice of this tasty bread typically contains around 100 calories, making it a guilt-free addition to your meal plan. It’s perfect for those keeping an eye on their calorie intake without sacrificing flavor.
Protein
Packed with plant-based goodness, each slice of chickpea flour protein bread boasts about 6 grams of protein. This can contribute significantly to your daily protein requirements, especially for those following a vegetarian or vegan lifestyle.
Sodium
With approximately 200 mg of sodium per slice, this bread is quite reasonable compared to many store-bought options. A balanced sodium intake is crucial for maintaining healthy blood pressure levels, so you can enjoy this bread without worry.
For more detailed nutritional insights, check trusted sources like the USDA Nutritional Database and the Academy of Nutrition and Dietetics. It’s always a good idea to check where your food is coming from!
FAQs about Chickpea Flour Protein Bread
Can I substitute the chickpea flour?
Absolutely! While chickpea flour is the star of this protein-packed bread, you can experiment with other flours if needed. If you’re looking for a gluten-free option, try almond flour or quinoa flour, both of which offer a different texture and flavor profile. Keep in mind, the end result may vary slightly in taste and protein content. Always consider checking the moisture levels or adjusting liquids when using different flours; it can help you maintain the right consistency for your bread.
How do I store this bread?
Storing your chickpea flour protein bread correctly ensures it stays fresh and delicious for as long as possible. Once cooled, wrap the bread tightly in plastic wrap or aluminum foil and store it at room temperature for up to three days. For longer preservation, consider freezing slices. Just keep them in an airtight container or a resealable freezer bag, and they can last for up to three months. When you’re ready to enjoy a slice, simply thaw it in the fridge or pop it in the toaster for a quick warm-up!
What makes this bread high in protein?
The magic of this protein bread lies in its main ingredient: chickpea flour. Chickpeas are naturally rich in protein, packing about 20 grams per 100 grams of flour—ideal for those looking to boost their protein intake. Additionally, pairing chickpea flour with seeds or nuts can further elevate the protein levels. If you’re interested in maximizing your protein intake, consider adding chia seeds or flaxseeds to the mix.
If you have more questions or want tips on maximizing your bread experience, feel free to check out resources on health benefits of chickpeas or gluten-free baking. Happy baking!
Conclusion on Chickpea Flour Protein Bread
In closing, chickpea flour protein bread represents a delightful way to enjoy a nutritious and satisfying loaf that packs a protein punch. This bread is not only easy to make but also versatile, pairing wonderfully with both sweet and savory toppings. Whether you choose to add Turkey Bacon, Chicken Ham, or even your favorite spreads, you’ll find that it enhances your meals beautifully.
Plus, it’s gluten-free, making it suitable for a variety of dietary needs. For a unique twist, consider trying out some flavorful herbs or seeds in the mix. If you’re eager to explore more about chickpea flour’s benefits, check out this article for a deeper dive into its nutritional star power. Enjoy your baking journey and the nourishing joys of chickpea flour protein bread!
PrintChickpea Flour Protein Bread: Easy Recipe for Healthy Eaters
Chickpea Flour Protein Bread is a nutritious and delicious alternative to traditional bread, packed with protein and perfect for a healthy diet.
- Prep Time: 10 minutes
- Cook Time: 35 minutes
- Total Time: 45 minutes
- Yield: 1 loaf 1x
- Category: Bread
- Method: Baking
- Cuisine: Mediterranean
- Diet: Gluten-Free
Ingredients
- 2 cups chickpea flour
- 1 teaspoon salt
- 1 teaspoon baking powder
- 1 tablespoon olive oil
- 2 cups water
Instructions
- Preheat the oven to 375°F (190°C).
- In a mixing bowl, combine the chickpea flour, salt, and baking powder.
- Add the olive oil and water, mixing until smooth.
- Pour the batter into a greased loaf pan.
- Bake for 30-35 minutes or until golden brown.
Notes
- For a flavored bread, consider adding herbs or spices.
- Let the bread cool before slicing for better texture.
Nutrition
- Serving Size: 1 slice
- Calories: 150
- Sugar: 1g
- Sodium: 200mg
- Fat: 4g
- Saturated Fat: 0.5g
- Unsaturated Fat: 3g
- Trans Fat: 0g
- Carbohydrates: 25g
- Fiber: 6g
- Protein: 7g
- Cholesterol: 0mg
Keywords: Chickpea Flour Protein Bread, healthy bread, gluten-free bread