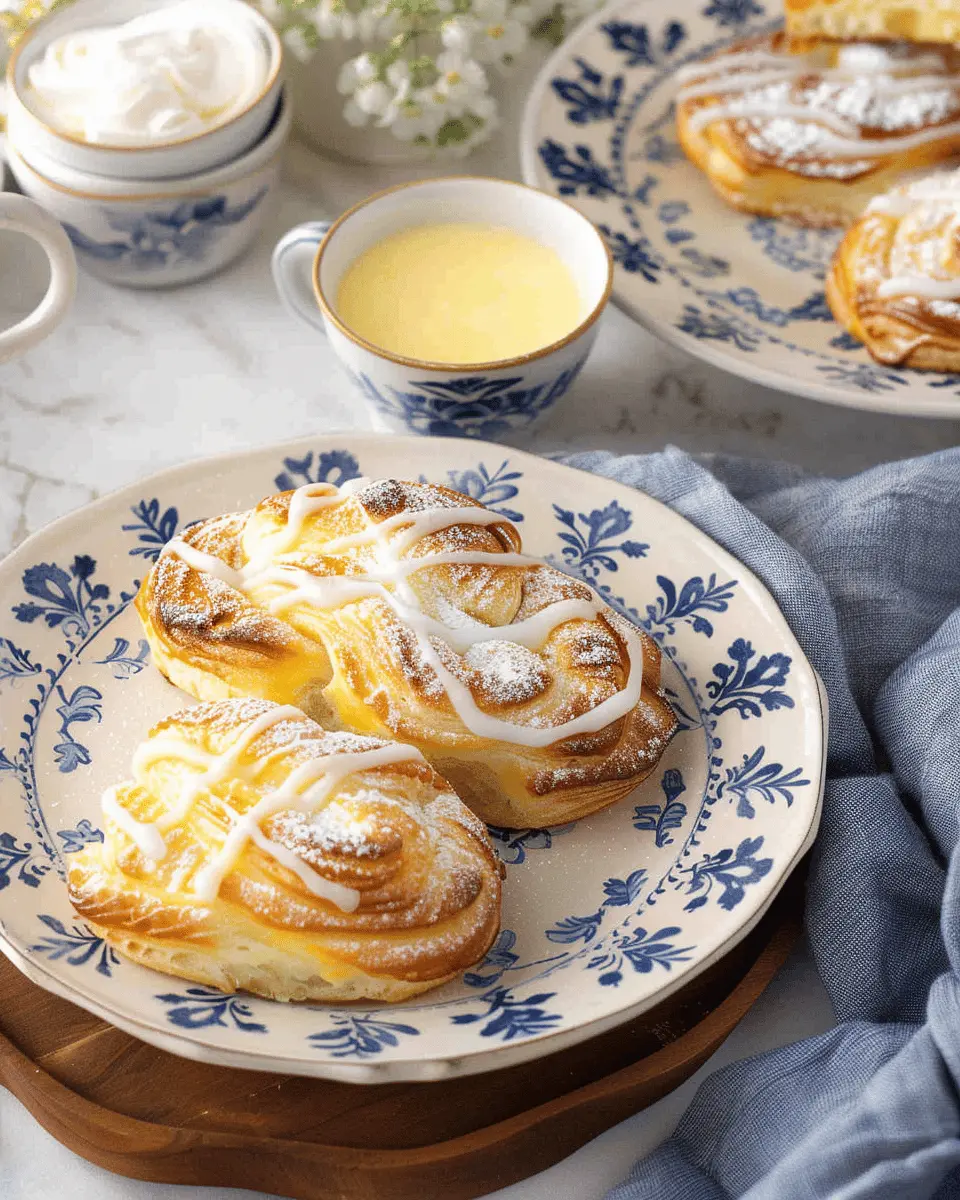
Introduction to Cheesecake Danish
Why Cheesecake Danish is the Perfect Homemade Treat
Have you ever craved something that combines the rich, creamy goodness of cheesecake with the delightful, flaky layers of pastry? Cheesecake Danish does exactly that, and it’s easier to make at home than you might think!
First, let’s talk about the joy of homemade treats. In a world where convenience often takes precedence, creating your own desserts can be a refreshing experience. Not only can you control the ingredients, but baking can also be a wonderful way to unwind after a busy day. The act of mixing and folding can be therapeutic, and the aroma of baked goods wafting through your kitchen is nothing short of magical.
So, why choose a cheesecake danish? For starters, they offer the perfect balance of textures and flavors. The crispy, buttery pastry shell complements the sweet and tangy cheesecake filling wonderfully. According to a recent study by the American Baker’s Association, well-made pastries can significantly boost happiness levels—so why not whip some up?
Let’s not forget the versatility of a cheesecake danish. You can customize them with your favorite fruits, spices, or even a drizzle of caramel sauce. The possibilities are almost endless! Additionally, they are great for sharing with friends or family during weekend brunches or cozy gatherings. It’s hard to resist a treat that looks just as good as it tastes!
If you’re feeling curious about baking, there are numerous resources available to guide you. Websites like King Arthur Baking provide tips and tricks that can help you achieve that perfect flaky pastry. Plus, if you’re rushed for time, you can easily use store-bought pastry dough to simplify the process.
In short, making a cheesecake danish is not just about satisfying a sweet tooth; it’s about enjoying the journey of creating something delicious. So put on your apron, gather your ingredients, and let’s dive into making these delightful pastries!

Ingredients for Cheesecake Danish
When you’re ready to whip up a delightful cheesecake danish, gathering the right ingredients is key to creating that perfect balance of creamy and flaky. Here’s what you’ll need:
Essential ingredients for the creamy filling
To achieve that irresistible creaminess, you’ll need:
- Cream Cheese: This is your base—opt for a full-fat variety for that rich flavor.
- Sour Cream: Adds a tangy kick that balances the sweetness.
- Sugar: Granulated sugar sweetens the filling just right.
- Vanilla Extract: A splash of real vanilla takes the flavor to the next level.
- Eggs: These bind everything together and give your filling a light texture.
These ingredients are essential for the creamy filling, making your cheesecake danish simply unforgettable.
Necessary items for the flaky pastry
For that flaky, golden crust, you’ll require:
- Puff Pastry: Store-bought is convenient; just thaw it before use!
- Butter: Use unsalted butter to brush over the pastry for enhanced flavor.
- Flour: For dusting, ensuring your pastry doesn’t stick while rolling.
This combination will create a delightful contrast to your rich cheesecake filling. While shopping, keep an eye out for high-quality puff pastry—it makes a noticeable difference in texture and taste. Want to explore more about the art of pastry? Check out resources like Serious Eats.
Now that you have everything lined up, it’s time to get baking! What’s your favorite twist on a classic cheesecake?
Preparing Cheesecake Danish
If you’re ready to whip up something delicious that’s sure to impress your friends or brighten up a gloomy day, a cheesecake danish is the way to go. This delightful treat combines creamy cheesecake filling with flaky pastry to create a dessert that’s both satisfying and utterly indulgent. Let’s dive into the steps to make your own cheesecake danish!
Gather and prepare your ingredients
Before we start, it’s important to ensure you have everything you need. Here’s a list of key ingredients:
-
For the pastry dough:
-
2 cups all-purpose flour
-
1/2 cup unsalted butter, chilled and cubed
-
1/4 cup sugar
-
1/4 teaspoon salt
-
1/4 cup cold water
-
For the cheesecake filling:
-
8 oz cream cheese, softened
-
1/4 cup sugar
-
1 egg yolk
-
1 teaspoon vanilla extract
-
Zest of one lemon (optional, for an extra zing)
Make sure your cream cheese is at room temperature for easier mixing. You can also prepare a simple homemade lemon zest for added freshness if you have a few lemons on hand.
Make the cheesecake filling
Now, let’s work on that delicious filling.
- In a mixing bowl, beat together the softened cream cheese and sugar until the mixture is smooth and creamy. This should only take a minute or two.
- Next, add in the egg yolk, vanilla extract, and lemon zest if you opted for it, and mix again until fully combined.
This filling is rich and velvety, making it the star of your cheesecake danish. Set it aside while you prepare the pastry, and don’t forget to taste test!
Prepare the pastry dough
Creating a flaky pastry might seem a bit daunting, but with a few guidelines, you’ll find it’s quite manageable.
- In a large bowl, combine the flour, sugar, and salt.
- Add the cubed butter, and using a pastry cutter or your fingertips, mix until the mixture resembles coarse crumbs.
- Gradually add cold water, mixing until it just comes together. Be careful not to overwork it—the goal is flaky!
Wrap your dough in plastic wrap and chill it in the refrigerator for at least 30 minutes. This helps soften the gluten and ensures a nice texture.
Roll and cut the pastry
Once your dough has been chilled, it’s time to roll it out.
- On a lightly floured surface, roll the pastry into a rectangle about 1/8 inch thick.
- Using a knife or pastry cutter, cut it into squares (around 4 inches each).
At this point, you’ll feel like a pastry chef! The squares don’t have to be perfect—just remember, they’ll be getting deliciously messy when assembled.
Assemble the cheesecake danish
Now comes the fun part—making your masterpiece!
- Place a spoonful of cheesecake filling in the center of each square.
- Fold the corners of each square towards the center, pinching them together gently. For an added touch, you can create a little swirl pattern by twisting the dough slightly.
- Arrange your assembled cheesecakes on a baking sheet lined with parchment paper.
Feel free to get creative with toppings! A light sprinkle of powdered sugar or a drizzle of glaze can elevate your cheesecake danish to a whole new level.
Bake the danish to perfection
Preheat your oven to 375°F (190°C).
- Bake your danishes for about 20-25 minutes or until golden brown.
- Once they’re out of the oven, let them cool slightly before indulging.
Proper baking time is crucial to achieve that masterful balance of crispy pastry paired with creamy filling. And who can resist warm pastries fresh from the oven?
Now that you’re armed with this step-by-step guide, I hope you feel empowered to make your cheesecake danish. Whether you’re enjoying it with your morning coffee or bringing it to your next gathering, this treat is sure to win hearts and appetites! If you’re looking for tea pairings or side dishes that complement these danishes perfectly, visit Tea Time Magazine for some delightful ideas. Enjoy your baking adventure!

Variations on Cheesecake Danish
When you think of cheesecake danish, the classic version may come to mind, but don’t hesitate to explore delightful variations that can take your treats to new heights. Here are some ideas to inspire your next baking adventure.
Seasonal Fruit Topping Ideas
As the seasons change, so can your cheesecake danish toppings! Fresh fruit can elevate your pastries, providing both flavor and a pop of color. Consider these ideas:
- Spring & Summer: Try juicy strawberries or vibrant blueberries. A simple strawberry glaze is excellent for drizzling on top.
- Fall: Think sliced apples or pears sprinkled with cinnamon.
- Winter: Ripe, winter citrus like mandarins can offer a refreshing contrast.
Mixing and matching these fruits adds not only taste but also visual appeal. For more fruit pairing ideas, check out ProduceForBetterHealth.org.
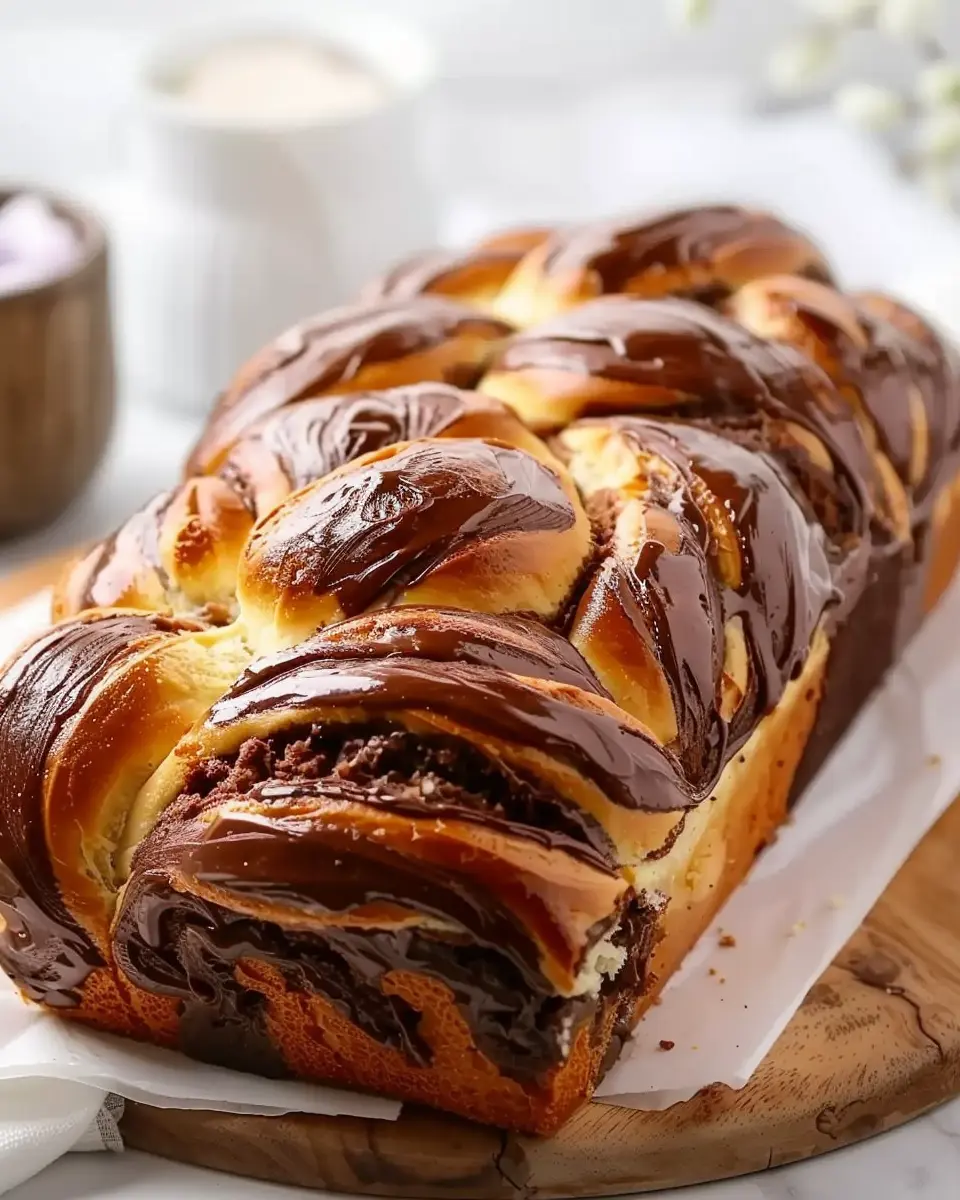
Chocolate Cheesecake Danish
If you’re a chocolate lover, why not indulge in a chocolate cheesecake danish? This variation is easy to adapt:
- Substitute half of the cream cheese with chocolate cream cheese for a rich twist.
- Swirl melted chocolate into the cream cheese filling before spreading it on the dough.
Top it off with a light sprinkle of cocoa powder for an elegant touch. This delightful treat is perfect for brunch with friends or a cozy night in!
Spiced Cheesecake Danish for Holidays
When the holiday season rolls around, spicing things up can create a warm, inviting flavor profile.
- Incorporate ground cinnamon or nutmeg into the cheesecake filling to evoke the essence of the season.
- Consider adding a hint of ginger or cloves for added depth.
These festive elements can transform your cheesecake danish into a must-have holiday dessert, perfect for sharing at gatherings.
Exploring these variations not only keeps things exciting but also allows you to impress your guests with your baking creativity. Happy baking!
Cooking Notes for Cheesecake Danish
Tips for Achieving the Perfect Flaky Pastry
To create a cheesecake danish with irresistibly flaky pastry, start by using cold ingredients—think chilled butter and ice water. This helps create those lovely layers. Don’t overwork the dough; when it’s combined, gently pat it into shape. If you’re looking for a deeper dive into pastry techniques, check out this dough-making guide.
Another trick? Allow the dough to rest in the refrigerator. This relaxes the gluten and leads to a lighter texture. Roll out your dough to about ¼ inch thick and don’t forget to dust your work surface with flour to prevent sticking!
Best Practices for Cheesecake Filling Consistency
When it comes to your cheesecake filling, achieving the right consistency is essential for your cheesecake danish. Start with cream cheese at room temperature for easier blending. Mix in sugar gradually to keep the texture smooth.
Opt for a heavy cream or Greek yogurt for that rich, creamy texture. If your filling feels too runny, add a dash of cornstarch to thicken it—about a tablespoon should do the trick.
Remember, a little tasting goes a long way—don’t be afraid to adjust sweetness or add a hint of vanilla for extra flavor!
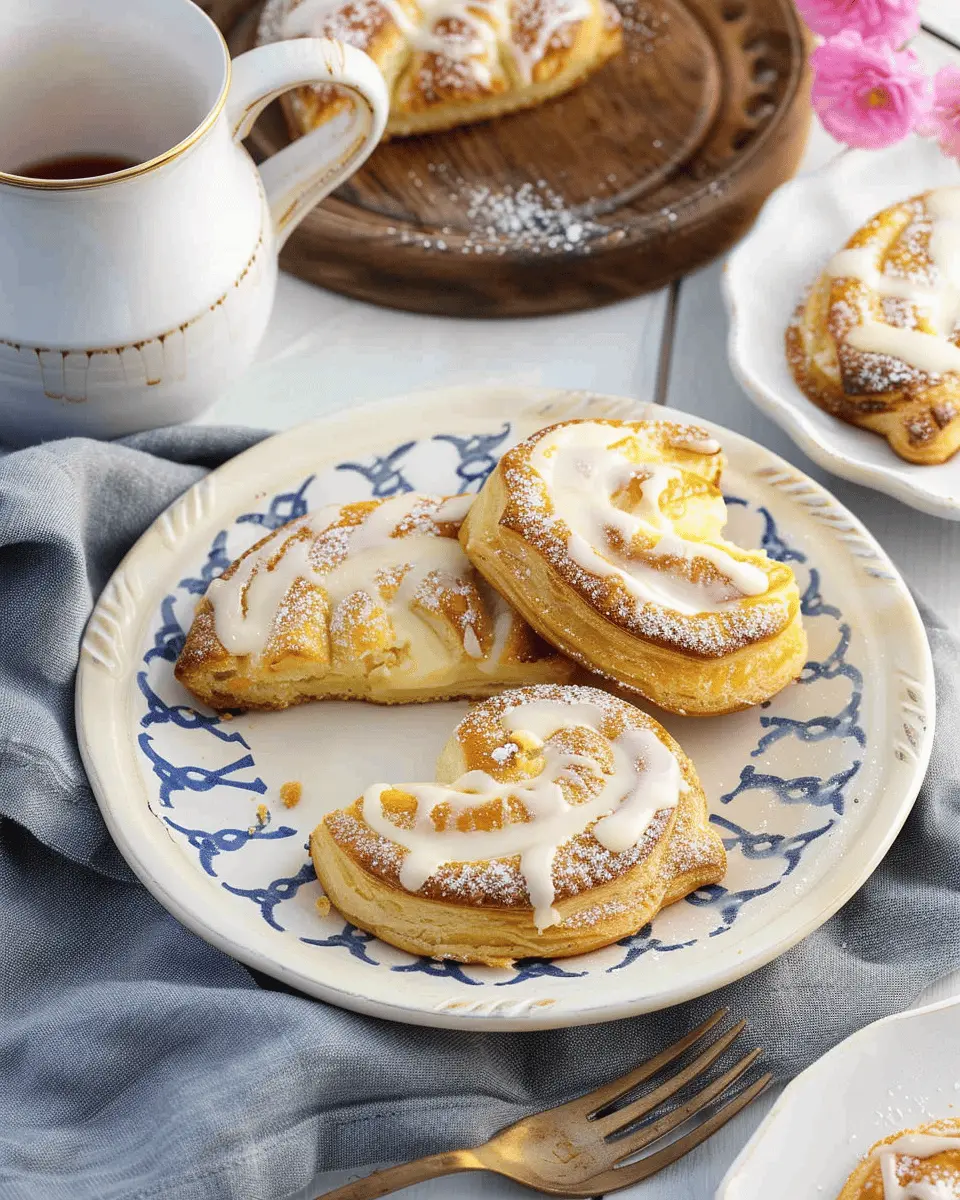
Serving Suggestions for Cheesecake Danish
Pairing with Fresh Fruit or Berry Coulis
A cheesecake danish shines when served with fresh fruit or a luscious berry coulis. Berries like strawberries, raspberries, or blueberries enhance the creamy tang of the cheesecake, creating a delightful contrast. Just imagine your danish adorned with a colorful medley of fresh berries—visually appealing and oh-so-tasty!
Consider making a simple berry coulis by blending your favorite berries with a touch of sugar and lemon juice. This adds not just flavor but also a splash of vibrant color that elevates your dessert to a new level. For more in-depth berry coulis recipes, you can check out resources like Bon Appétit.
Decadent Toppings and Drizzles
If you’re in the mood for indulgence, think about adding toppings that will take your cheesecake danish to the next level. Drizzle caramel or chocolate sauce over your danish for a sweet finish that complements its rich texture. Whipped cream or a dollop of crème fraîche can bring a silky smoothness that balances the density of the cheesecake.
For a touch of sophistication, sprinkle crushed nuts, like pistachios or almonds. Not only do they add a crunchy texture, but they also enhance the overall presentation. The right combination of toppings can make your cheesecake danish not just a dessert, but an unforgettable experience.
How do you like to personalize your danish? Share your favorite toppings in the comments!
Time Breakdown for Cheesecake Danish
Preparation Time
Making a delicious cheesecake danish starts with a bit of prep. You’ll want to set aside about 20 minutes to gather your ingredients, prepare your dough, and whip up that creamy filling. This time is crucial for ensuring every component shines!
Baking Time
Now, onto the fun part—baking! Your cheesecake danish will take about 25-30 minutes in the oven. Keep an eye on it; you want that golden-brown hue peeking through.
Total Time
Combining both preparation and baking, you’re looking at a total of 45-50 minutes. That’s not too bad, right? With a little bit of time and some simple steps, you’ll have a delightful treat that everyone will love. Check out resources like AllRecipes for more tips on mastering your baking skills!
Enjoy the process, and soon enough, you’ll be sharing your homemade cheesecake danish with friends and family. Who wouldn’t want a slice of that?
Nutritional Facts for Cheesecake Danish
Calories per serving
A cheesecake danish typically contains around 300 calories per serving. This decadent treat combines the rich flavors of cheesecake with the light, flaky texture of pastry, making it a delightful choice for breakfast or dessert. With its satisfying taste, it’s easy to forget you’ll need to keep an eye on those calories!
Key nutrients per danish
In addition to the calorie count, a single cheesecake danish packs a punch with key nutrients, including:
- Protein: Approximately 6 grams, which helps in muscle repair and maintenance.
- Carbohydrates: About 35 grams, providing the energy needed for your busy day.
- Calcium: Around 100 mg, important for healthy bones and teeth.
Be sure to balance your danish with other nutritious foods throughout the day.
Potential allergens to be aware of
As with many baked goods, it’s crucial to consider potential allergens in a cheesecake danish. Key allergens may include:
- Dairy: Found in the cream cheese filling and butter.
- Wheat: Present in the pastry dough.
- Eggs: Often included for richness and texture.
If you’re looking for alternatives or modifications, consider using gluten-free flour or dairy-free cream cheese to make this treat more inclusive for various dietary needs. For more information on managing food allergies, check out sources like the Food Allergy Research & Education.
Now that you know the nutritional facts, grab the ingredients and get ready to whip up your own delicious cheesecake danish!
FAQs about Cheesecake Danish
When diving into the delicious world of cheesecake danish, it’s natural to have questions! Let’s cover some common concerns to make your baking experience delightful.
How do I prevent my danish from becoming soggy?
To keep your cheesecake danish crisp and flaky, consider the following tips:
- Use cold ingredients. Ensure your butter and cream cheese are cold when mixing. This helps create those lovely, flaky layers.
- Avoid overfilling. It can be tempting to heap on the cheesecake filling, but less is often more. A tablespoon or so per pastry is usually sufficient.
- Pre-bake the base. If you’re using a thicker dough, a brief pre-bake can create a protective barrier that keeps moisture at bay.
For more baking tips, sites like Food52 offer great insights!
Can I make cheesecake danish ahead of time?
Absolutely! You can prepare your cheesecake danish in advance by assembling them and placing them in the fridge for a few hours before baking. This can actually enhance the flavors as they meld together. If you’re planning to prep them a day ahead, store them covered in the refrigerator to maintain freshness.
What’s the best way to store leftover cheesecake danish?
Leftover cheesecake danish can be stored easily:
- Refrigerate. Place them in an airtight container to keep them fresh for up to three days.
- Freeze for later. If you want to enjoy them later, you can freeze them. Just ensure they are well-wrapped, and they can last up to a month. When you’re ready to indulge, simply thaw them in the refrigerator overnight.
With these helpful tips, you’ll be well on your way to baking the perfect cheesecake danish! If you’re looking for further inspiration, check out Seriouseats for a range of delicious recipes. Happy baking!
Conclusion on Cheesecake Danish
Why You Should Try Making Cheesecake Danish at Home
Making a cheesecake danish at home not only satisfies your sweet cravings but also fills your kitchen with delightful aromas. The combination of creamy cheesecake filling and buttery pastry is a match made in culinary heaven. Plus, it’s an impressive treat to share with friends or family during brunch or special occasions.
Here are a few reasons why you should give it a shot:
- Customization: You can tweak ingredients to match your taste, whether that means adding fruit toppings, nuts, or flavored extracts.
- Freshness: There’s nothing like a warm, homemade danish. Fresh pastries taste remarkably better than store-bought versions.
- Creativity: Experimenting in the kitchen can be a pleasurable and rewarding activity, gaining new skills along the way.
So why wait? Dive into this delicious adventure and create memories over a cheesecake danish that’s uniquely yours. For more baking inspiration, check out insightful posts on sites like Serious Eats or King Arthur Baking for tips and tricks!
PrintCheesecake Danish: The Best Easy Recipe for Homemade Bliss
This Cheesecake Danish recipe combines cream cheese, sugar, and buttery pastry for a delightful treat.
- Prep Time: 20 minutes
- Cook Time: 25 minutes
- Total Time: 45 minutes
- Yield: 12 servings 1x
- Category: Dessert
- Method: Baking
- Cuisine: American
- Diet: Vegetarian
Ingredients
- 1 package cream cheese
- 1/2 cup granulated sugar
- 1 teaspoon vanilla extract
- 1 package puff pastry sheets
- 1 egg (for egg wash)
Instructions
- Preheat your oven to 375°F (190°C).
- In a bowl, mix the cream cheese, sugar, and vanilla until smooth.
- Roll out the puff pastry and cut into squares.
- Place a spoonful of the cream cheese mixture in the center of each square.
- Fold the corners of the pastry over the filling and seal.
- Brush the tops with beaten egg.
- Bake for 20-25 minutes until golden brown.
Notes
- Feel free to add fruit toppings for added flavor.
- Serve warm for the best taste experience.
Nutrition
- Serving Size: 1 danish
- Calories: 250
- Sugar: 12g
- Sodium: 200mg
- Fat: 14g
- Saturated Fat: 8g
- Unsaturated Fat: 4g
- Trans Fat: 0g
- Carbohydrates: 26g
- Fiber: 1g
- Protein: 4g
- Cholesterol: 40mg
Keywords: Cheesecake Danish, dessert, homemade, easy recipe