Introduction to Artisan Bread
The Joy of Homemade Bread: Why It Matters
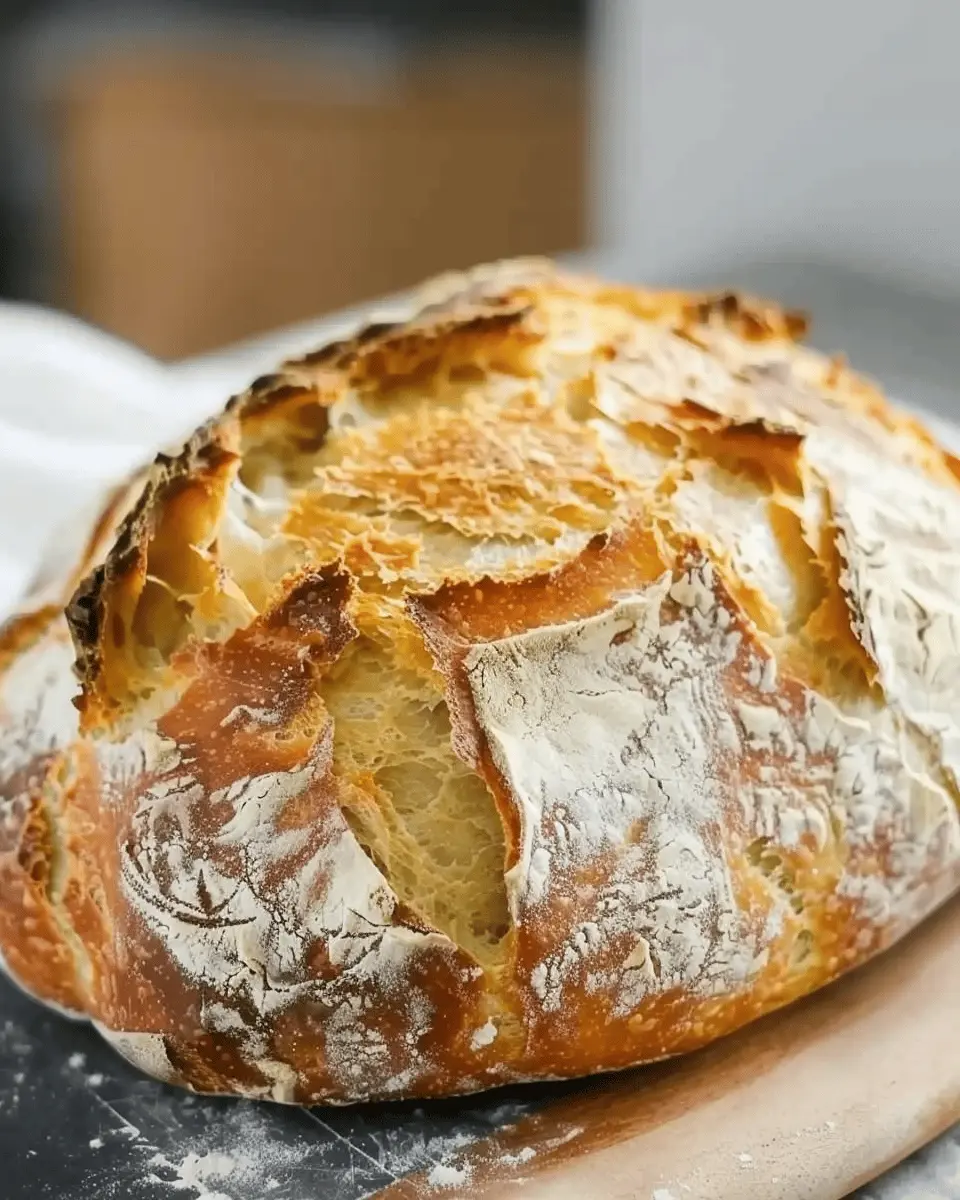
There’s something truly special about the aroma of freshly baked bread wafting through your kitchen. When you embark on the journey of making your own artisan bread, you’re not just creating a loaf; you’re crafting an experience filled with warmth, joy, and a hint of nostalgia.
You might wonder, why go through the effort of making bread at home when it’s so easily available at the store? Well, the answer lies in the quality and freshness of homemade bread. Store-bought options often contain preservatives and ingredients that you may not even recognize. When you follow an artisan bread recipe, you’re in complete control of every component. You select the flour, the yeast, and any additional ingredients that tickle your fancy—like herbs or nuts—ensuring that what comes out of your oven is as pure and delicious as it can be.
Moreover, creating your own bread is a fantastic way to destress after a long day. Kneading the dough can be almost therapeutic, allowing you to channel your energy into something creative and fulfilling. Plus, sharing a lovingly baked loaf with family or friends often brings people together in a way that takes the simple act of eating to another level. Imagine breaking bread together, enjoying the crusty exterior and soft, airy interior, all while engaging in meaningful conversation.
According to a study by the Bread Bakers Guild of America, people who bake their own bread experience a boost in happiness and satisfaction. It’s a blend of artistry and science, allowing you to develop skills you may have never realized you had!
As you dive into the world of artisan bread baking, remember that patience and practice are key. With this bread recipe—sourced from generations of bakers—you’ll find that each loaf you produce is not just a product, but a story waiting to be shared. So, roll up your sleeves and prepare to delight your senses as you create something truly extraordinary in your own kitchen. You won’t just make bread; you’ll make memories.
Explore the joy of baking artisan bread and discover the magic of home-cooked experiences!
Ingredients for Artisan Bread
The Essential Ingredients You’ll Need
Creating a delightful artisan bread recipe starts with gathering the right ingredients. Here’s a breakdown of the essentials that will elevate your bread-baking game:
-
Flour: The foundation of your bread. Typically, a high-quality bread flour is best due to its high protein content, which gives your bread that perfect chewy texture.
-
Water: Hydration is key. Use filtered water for the best results, as tap water can contain chlorine that interferes with yeast activity.
-
Yeast: Opt for active dry yeast or instant yeast. While some bakers swear by sourdough, using commercial yeast is a quicker alternative for those short on time.
-
Salt: Don’t skip this one! Salt not only enhances flavor but also strengthens gluten structure, which is essential for that coveted crust.
-
Optional Extras: Consider adding ingredients like olive oil for richness or herbs for flavor. You could also play with different flours, such as whole wheat for a nuttier taste.
Crafting your artisan bread is a rewarding experience, offering both a delicious result and the joy of baking. For a deeper dive into baking techniques, check out resources like King Arthur Baking that cater to all your baking needs!
Preparing Artisan Bread
Baking artisan bread is one of life’s simple pleasures. If you’re looking to impress your friends or simply want to indulge in the comforting aroma of freshly baked bread, this guide will walk you through the steps seamlessly. Whether you’re a seasoned baker or a newbie, making your own bread at home is rewarding and surprisingly straightforward.
Gather Your Ingredients
Before diving into the baking process, it’s essential to gather your ingredients. For this artisan bread recipe, you’ll need:
- 3 cups of all-purpose flour (plus more for dusting)
- 1 ½ teaspoons of salt
- 1 teaspoon of instant yeast
- 1 ½ cups of warm water (about 110°F or 43°C)
Using high-quality flour can make a significant difference in the flavor and texture of your bread. Consider sourcing local or organic flour if you have the option.
Mix the Dry Ingredients
In a large mixing bowl, combine the flour, salt, and instant yeast. Mix them together gently with a whisk or a fork to ensure they’re evenly distributed. This step is crucial because the yeast needs an even mix to work its magic.
Combine with Warm Water
Now, it’s time to create that beautiful dough. Pour in the warm water and mix with a wooden spoon or your hands until a shaggy dough forms. You want to combine everything without overworking, allowing the dough to come together loosely.
Have you ever heard that touchy-feely cooking style is the best? Getting your hands right into the dough gives you the chance to feel its texture, which is an essential part of the process.
Let It Rise
Cover the bowl with a kitchen towel or plastic wrap and let the dough rise at room temperature for about 12 to 18 hours. This long fermentation is what gives artisan bread its distinctive flavor and lovely texture. You might be wondering why it needs so long—during this time, the yeast works hard to develop acidity and structure.
So, grab a book or binge-watch your favorite show while the dough does its thing.
Shape Your Dough
Once the dough has roughly doubled in size, it’s time to shape it. Transfer it onto a floured surface and stretch it gently into a rough rectangle. Fold the edges towards the center and then flip it over. This helps create tension in the dough, which is vital for a gorgeous loaf.
Preheat Your Oven
With your dough shaped, it’s time to preheat your oven to 450°F (232°C). If you’re using a Dutch oven, place it inside to heat up as well. This will help achieve a perfect crust when baking.
Create Steam for That Perfect Crust
A key element to achieving a delightful crust is steam. Once you place your shaped dough in the hot Dutch oven, cover it with the lid for the first half of the baking time. The steam helps the bread rise and creates that signature crispy outer layer.
Bake to Golden Perfection
Carefully remove the lid halfway through the baking time (about 30 minutes). Allow the bread to bake for an additional 15 to 20 minutes, until it’s a crisp golden brown. When you tap the bottom of the loaf, it should sound hollow—a good sign that it’s fully baked.
Once out of the oven, let your artisan bread cool on a wire rack for at least an hour. This patience ensures that the inside continues to set perfectly.
With these steps, you’re well on your way to mastering the art of artisan bread. This journey not only fills your kitchen with amazing aromas but also provides you with a delicious loaf to share with friends or enjoy solo with some olive oil and balsamic vinegar. Happy baking!
Variations on Artisan Bread
Artisan bread is like a blank canvas that welcomes creativity in the kitchen. Once you master a basic artisan bread recipe, you can experiment with various ingredients and flavors to suit your taste and occasion. Let’s dive into some delightful variations!
Whole Wheat Artisan Bread
If you’re looking for a healthier twist, why not try whole wheat artisan bread? This version adds rich, nutty flavors and offers more fiber than its white counterpart.
- Ingredients: Substitute half of the all-purpose flour with whole wheat flour.
- Tip: Keep an eye on hydration; whole wheat flour absorbs more water, so you may need to adjust your water content slightly.
- Outcome: You’ll enjoy a heartier loaf that’s perfect for sandwiches or topped with fresh avocado.
Herb-Infused Artisan Bread
Give your artisan bread recipe a fragrant lift by adding fresh herbs. Think rosemary, thyme, or basil!
- Ingredients: Just chop up a handful of your favorite herbs and mix them into the dough during the initial mixing phase.
- Tip: Pair your herb loaf with a rich olive oil or as a side for hearty soups.
- Outcome: Your kitchen will smell divine, and the aromatic bread will elevate any meal.
Cheese and Olive Artisan Bread
For those cheese lovers out there, try adding cheese and olives for a savory twist!
- Ingredients: Mix in your favorite cheese (like feta or cheddar) and chopped olives.
- Tip: Cheese adds moisture, so adjust your water slightly to maintain the dough’s balance.
- Outcome: This irresistible combination is a fantastic conversation starter at dinner parties or simply enjoyed on its own.
Feel free to explore these variations and personalize them further. Have fun in the kitchen, and remember, the best bread is made with love and creativity! If you’re looking for more inspiration, check out King Arthur Baking or The Bread Lab for tips and tricks on perfecting your loaves.
Cooking Tips and Notes for Artisan Bread
Essential Tips for Beginners
Making your own artisan bread can be a rewarding experience, but it does come with a learning curve. Here are some essential tips to get you started:
- Use high-quality ingredients: Your bread will only be as good as the ingredients you choose. Look for organic flour and fresh yeast.
- Experiment with hydration: A wetter dough can yield a crusty loaf, so don’t be afraid to adjust the water content.
- Take your time: Allowing your dough to rise slowly can enhance flavor. Aim for a longer fermentation at cooler temperatures if your schedule allows.
If you’re looking for more information on the science of bread-making, Breadtopia offers a wealth of knowledge.
Common Mistakes to Avoid
Even seasoned bakers can stumble. Here are mistakes to dodge:
- Skipping the preheating: Always preheat your oven; it’s crucial for that perfect crust.
- Ignoring the dough texture: Trust your instincts. If it feels too dry or sticky, adjust accordingly before baking.
- Not using a thermometer: A quick way to dodge under or over-baked bread is to use an instant-read thermometer. The internal temperature should reach about 190°F for a perfect loaf.
Ready to dive into your artisan bread recipe? Enjoy the process and stay curious!
Serving Suggestions for Artisan Bread
Enjoying with Dips and Spreads
One of the best things about your homemade artisan bread recipe is its versatility. Slice your bread and pair it with a delightful array of dips and spreads. Some popular options include:
- Hummus: This creamy chickpea dip is not only healthy but also adds a savory touch to your bread.
- Olive Tapenade: Such a Mediterranean delight! This flavorful blend of olives can elevate your bread to new heights.
- Whipped Feta: A tangy and creamy feta spread brings a unique twist that complements the chewy texture of your bread perfectly.
Perfect Pairings for Your Artisan Bread
Think about what makes your meals complete. Artisan bread can serve as accompanying delight or a stand-alone star. Here are a few delicious pairings you might consider:
- Turkey Bacon Sandwiches: Layer slices of artisan bread with turkey bacon, fresh greens, and your favorite spreads for a satisfying bite.
- Chicken Ham & Cheese: Toasted artisan bread can cradle chicken ham with a generous slice of cheese for an irresistible melty experience.
- Hearty Soups: Dipping your bread into comforting tomato or vegetable soup creates a warm, fulfilling combo.
These serving suggestions are not just food ideas—they’re an opportunity to create memorable moments. After all, sharing good food is about more than just taste; it’s about connection and enjoyment. What will you try first? For more ideas, check out Taste of Home for inspiration!
Time Breakdown for Artisan Bread
Creating your delicious artisan bread is a rewarding experience, but it does require a bit of patience. Here’s a breakdown of how to manage your time effectively for this artisan bread recipe.
Preparation Time
To start, set aside about 20-30 minutes to gather your ingredients, mix your dough, and get everything set up. It’s a simple process, so take this time to enjoy the moment and maybe listen to your favorite playlist.
Rising Time
The rising period is where the magic happens. Expect your dough to take around 1.5 to 2 hours to rise. This might feel like a long wait, but it’s crucial for developing those amazing flavors and textures. If you’re interested in the science behind bread rising, check out Serious Eats for some fascinating insights.
Baking Time
Once your dough has risen to fluffy perfection, baking will take approximately 30-40 minutes. Keep an eye on it—golden brown is key for that perfect crust we all crave. Are you using a baking stone? You might find some helpful tips in this video guide.
Total Time
In total, you’re looking at about 2.5 to 3 hours from start to finish, not including any hands-off time as you let the dough rise and cool. Remember, good things take time, and each moment is part of creating something truly special! Enjoy the journey of making your artisan bread!
Nutritional Facts for Artisan Bread
Calories and Nutrients Per Slice
Artisan bread typically contains about 70-80 calories per slice, depending on the ingredients used. A slice offers essential nutrients such as:
- Carbohydrates: Provides energy.
- Protein: Supports muscle repair and growth.
- Fiber: Promotes digestive health, especially if whole grains are used.
- Vitamins and Minerals: Including B vitamins and iron, particularly when crafted from enriched flour.
You can learn more about the specific nutritional content by checking out sources like the USDA FoodData Central.
Healthy Aspects of Homemade Bread
Creating your artisan bread recipe at home allows you to control the quality of ingredients. By using whole grains, you not only increase the fiber content but also boost the nutritional profile. Plus, homemade bread lacks many preservatives found in store-bought options, making it a fresher choice. Not to mention, baking your own bread can be a rewarding experience, offering a great way to unwind after a busy day. Plus, do you really need another excuse to enjoy the aroma of fresh bread wafting through your kitchen? It’s a win-win!
For more insights on healthy bread-making, check out this article on Healthline.
FAQ about Artisan Bread
Can I use different types of flour?
Absolutely! One of the joys of the artisan bread recipe process is experimenting with various flours. While traditional all-purpose flour works beautifully, try using bread flour for a chewier texture, or whole wheat flour for added nutrition. Don’t hesitate to mix in specialty flours like spelt or rye for a unique flavor twist. Just keep in mind that different flours absorb water differently, so you may need to adjust your liquid amounts accordingly.
How do I store my fresh bread?
Storing your freshly baked bread can be just as important as the baking process itself. Here’s how to keep that homemade goodness fresh:
- Room temperature: If you plan to eat your bread within a few days, wrap it in a clean kitchen towel to keep it crusty yet soft.
- Freezing: For longer storage, slice the bread and wrap it tightly in plastic wrap, then place it in a freezer bag. It can last up to three months!
- Avoid plastic bags for short-term storage, as this can make the crust soft and gummy.
You can learn more about bread storage tips through reputable sources like Serious Eats.
Why is letting dough rise important?
Don’t skip this step! Allowing your dough to rise is crucial for several reasons:
- Flavor Development: The longer dough ferments, the more complex the flavors become.
- Texture: Fermentation creates air bubbles, giving your bread a delightful airy quality.
- Digestibility: A proper rise helps break down gluten, making it easier on your stomach.
For further insight into artisan techniques, check out The Bread Baker’s Apprentice. Happy baking!
Conclusion on Artisan Bread
The Last Slice: Embracing the Bread-Making Journey
Baking your own artisan bread is more than just a recipe; it’s a rewarding journey. With each step—from mixing the ingredients to the delightful aroma filling your kitchen—you’re creating something truly special. This artisan bread recipe invites you to experiment, adjust, and function at your own pace, igniting your creativity in the process.
Imagine serving that last slice to friends, each bite a testament to your kitchen skills. Whether it’s paired with hearty soups or as the foundation for a tasty sandwich, like turkey bacon or chicken ham, your homemade bread will surely impress. So, roll up your sleeves and dive into this delicious adventure. For tips on perfecting your technique, check out resources from experts like King Arthur Baking or The Artisan Bread School. Happy baking!
PrintArtisan Bread Recipe: The Easy Way to Craft Perfect Loaves
Learn how to make artisan bread effortlessly with this simple recipe that yields delicious, crusty loaves.
- Prep Time: 15 minutes
- Cook Time: 45 minutes
- Total Time: 13 hours
- Yield: 1 loaf 1x
- Category: Bread
- Method: Baking
- Cuisine: American
- Diet: Vegetarian
Ingredients
- 3 cups all-purpose flour
- 1 1/2 cups warm water
- 1 packet active dry yeast
- 1 tablespoon salt
Instructions
- In a large bowl, mix together the flour, yeast, and salt.
- Add the warm water and stir until a sticky dough forms.
- Cover the bowl with plastic wrap and let it rise for 12 to 18 hours.
- Preheat your oven to 450°F (230°C).
- Place a Dutch oven inside the oven to heat up.
- Transfer the dough to a floured surface and shape it into a ball.
- Carefully remove the hot Dutch oven, place the dough inside, cover it, and bake for 30 minutes.
- Uncover and bake for an additional 15 minutes until golden brown.
Notes
- For a softer crust, bake the bread covered for the entire time.
- Experiment with different types of flour for varied flavors.
Nutrition
- Serving Size: 1 slice
- Calories: 120
- Sugar: 0g
- Sodium: 200mg
- Fat: 0.5g
- Saturated Fat: 0g
- Unsaturated Fat: 0g
- Trans Fat: 0g
- Carbohydrates: 25g
- Fiber: 1g
- Protein: 4g
- Cholesterol: 0mg
Keywords: artisan bread, easy bread recipe, homemade bread