Introduction to Baked Yogurt Bars
If you’re a busy professional trying to juggle work, social life, and personal health, you’ve reached the right spot. Let’s talk about how baked yogurt bars can make your hectic days not just manageable, but delicious too. These bars are your new best friend, seamlessly blending nutrition with convenience.
Why Baked Yogurt Bars Are a Game-Changer for Busy Professionals
Imagine this: it’s Monday morning, you overslept, and breakfast feels like a distant dream. Instead of grabbing a sugary granola bar that leaves you feeling flat, why not reach for a baked yogurt bar—the perfect blend of flavor and nutrition? These bars are not just a tasty treat; they are a wholesome option packed with protein, probiotics, and essential vitamins.
-
Convenience: Pre-baking a batch during the weekend means you have quick options throughout the week. Simply grab one as you dash out the door or throw it in your bag for a mid-morning snack.
-
Customizable: You can easily personalize your bars to suit your taste. Add fruits, nuts, or even your favorite seeds, making each batch uniquely yours. This versatility is key for avoiding recipe fatigue.
-
Healthy Eating: According to the USDA, only about 12% of adults get the recommended amount of fruits and vegetables daily. These yogurt bars can help boost your intake in a fun and tasty way, making health feel less like a chore and more like a treat.
As a personal anecdote, I started making these bars when I realized my mornings often spiraled into chaotic coffee runs and unhealthy snack choices. I never looked back! Each bite is a delightful reminder that health can be both achievable and enjoyable.
Plus, with the right recipe, you can whip up a batch in under an hour. That means more time for important things—like catching up with friends, stressing over deadlines, or binge-watching your favorite series.
Ready to transform your mornings? Dive into the recipe below, and let’s get baking those baked yogurt bars that will fuel your busy life!
Ingredients for Baked Yogurt Bars
The essentials for the perfect yogurt bars
Creating baked yogurt bars is all about balance and quality ingredients. Whether you’re looking for a nutritious snack or a quick breakfast option, here’s a breakdown of what you’ll need:
- Greek Yogurt: Choose full-fat or low-fat, but make sure it’s unsweetened. This will give your bars a creamy texture without unwanted sugars.
- Oats: Rolled oats work best as they provide that chewy texture. Plus, they’re a fantastic source of fiber!
- Honey or Maple Syrup: For natural sweetness, use honey or maple syrup. These alternatives not only sweeten but also add a nice depth of flavor.
- Eggs: Two large eggs will help bind everything together while providing protein that keeps you feeling full.
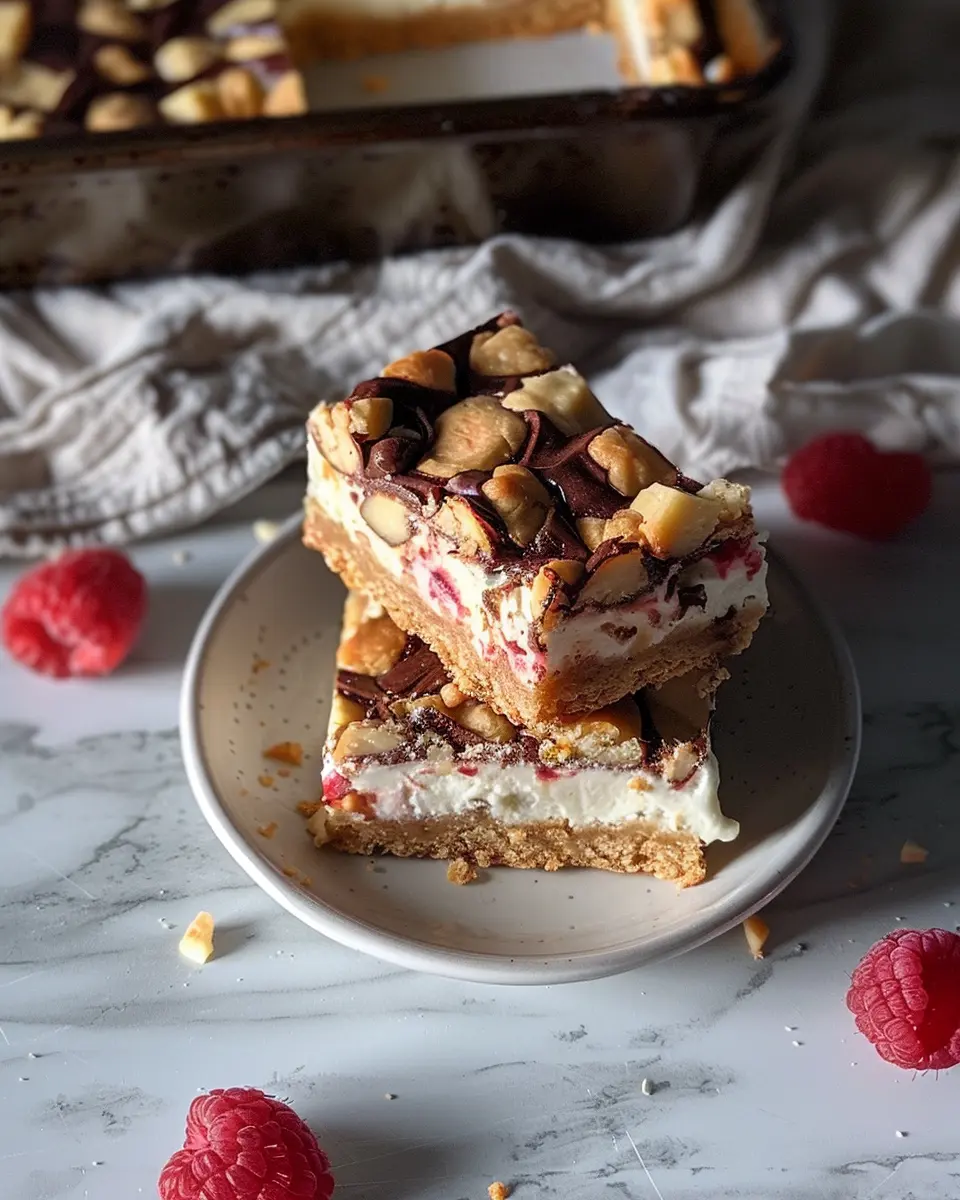
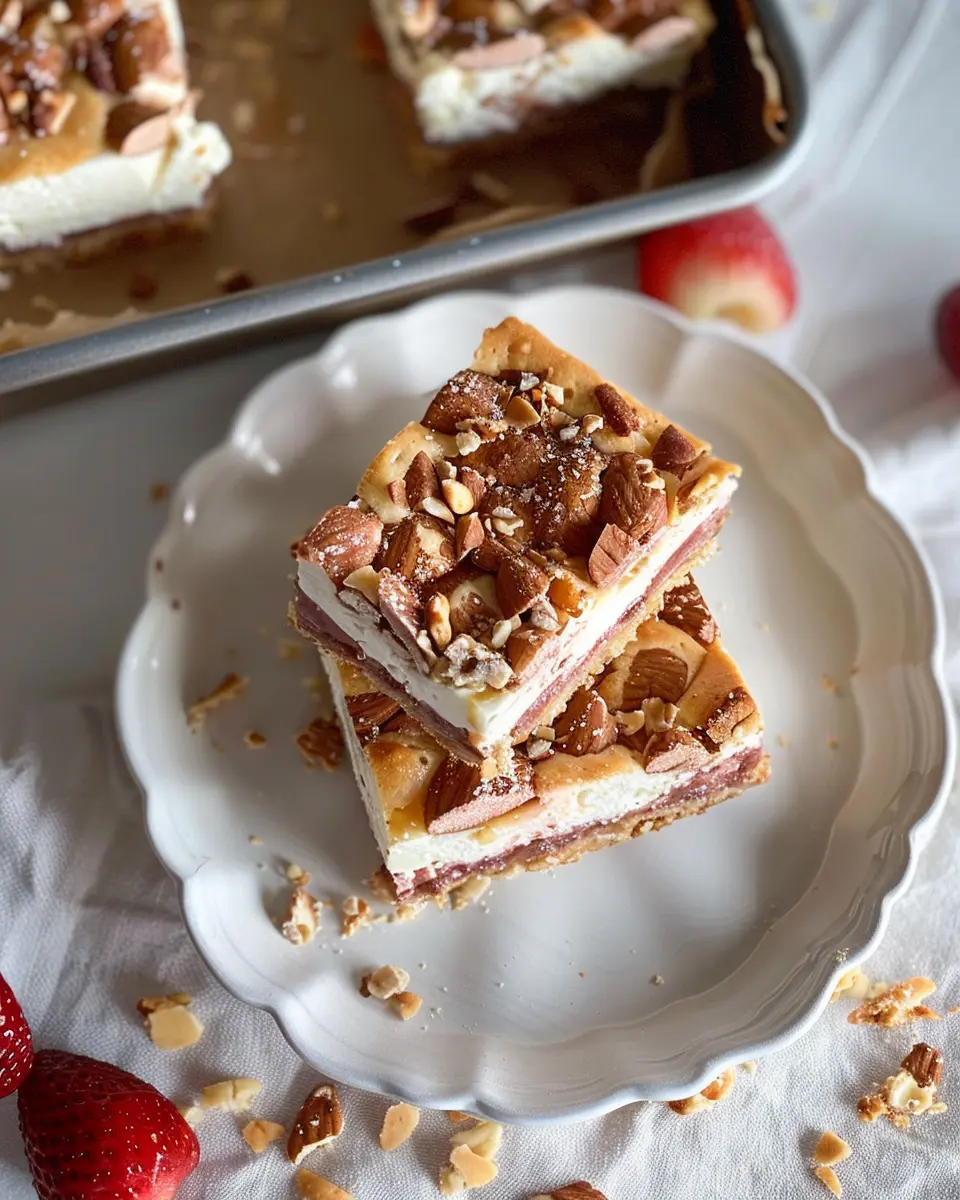
- Fruits: Fresh or frozen berries are excellent additions. They’re packed with vitamins and antioxidants; plus, they bring a burst of color!
- Nuts or Seeds: Chopped almonds, walnuts, or chia seeds add crunch and healthy fats.
Curious about how these ingredients work together? Each component contributes uniquely to the texture and flavor, making them perfect for any time of the day. Check out this guide on nutritional benefits of greek yogurt for more insights!
Dive into the world of baked yogurt bars, and explore how these simple ingredients come together to make a deliciously satisfying treat!
Preparing Baked Yogurt Bars
Creating baked yogurt bars at home is a delightful culinary adventure that combines simplicity with wholesome ingredients. These bars make for a nutritious snack or dessert, packed with protein and flavor. Let’s dive into the steps you’ll need to follow to prepare these delicious treats!
Gather Your Equipment
Before you roll up your sleeves and start mixing, it’s essential to have your equipment ready. Here’s what you’ll need:
- Baking Dish: A square or rectangular dish (around 8×8 inches) works perfectly.
- Mixing Bowl: A large bowl for combining all ingredients.
- Whisk: To mix everything smoothly.
- Spatula: For pouring and spreading the mixture in the baking dish.
- Oven Mitts: Safety first – you’ll need these when handling the hot dish!
Getting all your gear in place will make the process smoother, and you’ll be less likely to forget anything crucial. Plus, it sets the tone for a fun cooking session!
Preheat Your Oven
Now that you’re fully equipped, it’s time to preheat your oven. Set it to 350°F (175°C). Preheating is key because it ensures that your baked yogurt bars start cooking right away, allowing for even texture and that deliciously golden top. While the oven warms up, this is a great opportunity to gather your ingredients if you haven’t done so yet.
Mix the Ingredients
With the oven preheating, let’s whip together the ingredients. Here’s a simple checklist of what you’ll need for the baked yogurt bars:
- 2 cups of plain Greek yogurt
- 1/2 cup of honey or maple syrup for a natural sweetener
- 2 large eggs
- 1 cup of rolled oats
- 1 teaspoon of vanilla extract
- Optional: nuts, dried fruits, or chocolate chips to personalize your bars.
In a large mixing bowl, combine the yogurt, sweetener, and eggs. Whisk everything together until it’s well blended. This step is crucial because it determines the base flavor of your bars. The creaminess of the yogurt combined with the sweetness from honey or maple syrup creates a rich foundation that you will love.
Pour and Smooth
Once your ingredients are well mixed, it’s time to give them their shape. Pour the mixture into your prepared baking dish. Use a spatula to smooth the top evenly; this helps with uniform baking. A little trick here is to tap the dish gently on the counter to release any air bubbles that may be trapped in the mixture. This simple step promotes even cooking throughout.
Bake to Perfection
Now, slide the dish into your preheated oven and let it bake for about 25-30 minutes. Keep an eye on it as it cooks! You’ll know it’s done when the edges are slightly golden and a toothpick inserted in the middle comes out clean. The aroma filling your kitchen during this time will be irresistible!
Chill and Slice
Once baked, your baked yogurt bars will need some time to cool down. Remove them from the oven and let them sit at room temperature for about 10 minutes. Then, transfer the dish to the refrigerator for at least one hour. Chilling helps set the bars properly and makes slicing easier.
Once chilled, use a sharp knife to cut the bars into squares or rectangles, whatever suits your style! These can be stored in an airtight container for up to a week, although I bet they’ll disappear much faster!
Baking baked yogurt bars is not just about satisfying hunger; it’s about creating something that can be enjoyed at any time of the day. Whether you need an energy boost during your workday or a healthy option for dessert, these bars have got you covered. And hey, experiment with additional toppings like berries or nuts to give each batch your personal touch! If you want to dive deeper into healthy snacking ideas, check out resources such as the American Heart Association for inspiration. Happy baking!
Variations on Baked Yogurt Bars
When it comes to creative snacking, baked yogurt bars are a delightful canvas. Here are a few tasty variations that are sure to elevate your baking game and satisfy your cravings.
Fruity Yogurt Bars
Imagine biting into a fluffy baked yogurt bar bursting with fruity goodness. You can mix in your favorite fruits—blueberries, raspberries, or even diced mango—for a refreshing twist. For a hint of extra sweetness, consider drizzling honey or maple syrup over the top before baking. Want a splash of citrus? Zest a lemon or orange into the mix for an added zing.
Merging the flavors of yogurt and fruit not only enhances the taste but also packs in additional nutrients. Studies suggest that incorporating a variety of fruits can provide essential vitamins and antioxidants. Check out this article on the benefits of fruit in your diet here.
Nutty Yogurt Delight
If you’re craving something richer, try adding a mix of nuts to your baked yogurt bars. Walnuts, almonds, or even a sprinkle of nut butter can enrich the texture and flavor. Chopped nuts provide not just crunch but also a dose of healthy fats and protein. They keep you energized through those busy workdays.
For a delicious spin, consider including a handful of oats for a wholesome touch. Have you ever tried experimenting with nutty additions? It’s a game changer!
Chocolate Chip Yogurt Bars
Who can resist a good chocolate chip treat? For a classic twist, fold in semi-sweet or dark chocolate chips into your baked yogurt bars mixture. The melt-in-your-mouth chocolate creates a beautifully balanced flavor, making these bars the perfect indulgence. If you want to amp it up, a pinch of sea salt can really elevate the chocolate flavor and create a symphony of taste.
Just imagine enjoying a warm bar straight from the oven, chocolate slightly oozing out. It’s one of those simple pleasures that make baking so rewarding. Interested in more dessert ideas? Check out this fantastic guide on how to incorporate chocolate thoughtfully in your diet here.
Diving into these variations not only makes your baked yogurt bars more exciting but also ensures you never tire of the same old recipe. Happy baking!
Cooking Tips and Notes for Baked Yogurt Bars
Substitutions and Adjustments
When whipping up your baked yogurt bars, flexibility is key! Feel free to consider these substitutions if you don’t have all the ingredients at hand:
- Yogurt: Greek yogurt works well for a thicker texture, while regular yogurt gives a lighter feel. Non-dairy options like coconut or almond yogurt are also great for a vegan twist.
- Sweeteners: Use honey, agave, or maple syrup instead of granulated sugar for a more natural sweetness. Just keep the quantities similar to maintain the texture.
- Fruits: Fresh or frozen fruits, such as berries, bananas, or apples, can replace the base flavoring. Chop them finely and mix them into the batter for a delightful burst of flavor.
- Spices: Don’t hesitate to experiment with spices! Adding cinnamon, nutmeg, or even vanilla extract can elevate your baked yogurt bars to a new level.
Remember, cooking is about creativity. So, what personal touch will you add to your baked yogurt bars? For more inspiration, check out these simple yogurt bar ideas from a trusted culinary source!
Serving Suggestions for Baked Yogurt Bars
Enjoying Them Warm vs. Chilled
When it comes to baked yogurt bars, the enjoyment can vary greatly depending on whether you prefer them warm or chilled. Fresh out of the oven, they have a delightful softness and a warm, gooey center that’s perfect for a cozy morning snack. Pair them with a steaming cup of herbal tea for a soothing experience. On the other hand, if you chill them, you’ll unleash a refreshing texture that enhances their flavor. Chilled bars make for a great afternoon pick-me-up during warm days—just slice and serve!
Creative Toppings to Try
Elevate your baked yogurt bars by experimenting with toppings. Here are some ideas to get you started:
- Fruits: Fresh berries, sliced bananas, or diced mango add a burst of flavor.
- Nuts & Seeds: Chopped almonds or pumpkin seeds provide an enjoyable crunch.
- Coconut Flakes: A sprinkle of toasted coconut adds a tropical twist.
- Nut Butters: Drizzle some almond or cashew butter for a protein boost.
These toppings not only enhance the flavor but also increase the nutritional value of your bars. You can find more tips on healthy toppings in articles from sites like Healthline or Health.com for further inspiration. Enjoy your creation!
Time Breakdown for Baked Yogurt Bars
When you’re looking to whip up a delicious batch of baked yogurt bars, knowing the time commitment is essential. Here’s a quick rundown to help you plan your kitchen adventure!
Prep Time
Getting started is a breeze! You’ll need about 10-15 minutes to gather your ingredients and mix everything together. Don’t rush this step; it’s the foundation for those flavorful bars.
Cook Time
Once prepped, pop those bars in the oven for 25-30 minutes. Keep an eye on them as they bake to ensure they rise perfectly and get a lovely golden hue.
Total Time
In just over 40-50 minutes, from prep to enjoying your freshly baked yogurt bars, you’ll have a wholesome snack ready to fuel your day. Isn’t that delightful? So, grab your ingredients and get creative! For some inspiration on yogurt forms, check out this resource on yogurt benefits.
With this time breakdown in hand, you’ll find making baked yogurt bars fits smoothly into your busy lifestyle!
Nutritional Facts for Baked Yogurt Bars
Calories and Macronutrients
When you indulge in baked yogurt bars, you’re treating yourself to a wholesome snack! Each serving generally contains around 150 calories, packed with about 6 grams of protein and 4 grams of healthy fats. With roughly 20 grams of carbohydrates, these bars provide a balanced energy boost, perfect for a mid-morning pick-me-up or an afternoon snack.
Health Benefits of Key Ingredients
The ingredients in baked yogurt bars offer a range of health benefits. Greek yogurt, rich in probiotics and calcium, supports gut health and strengthens bones. Whole grains provide essential fiber, aiding digestion and keeping you satiated longer. Additionally, if you incorporate fruits like blueberries or bananas, you gain antioxidants—important for fighting inflammation and supporting overall wellness. If you’re curious about the impact of these nutrients, check out this article on nutritional benefits for deeper insights!
So, whether you’re a busy professional or a fitness enthusiast, these bars can easily fit into your lifestyle while keeping your nutrition in check!
FAQs about Baked Yogurt Bars
Can I freeze these bars?
Absolutely! Freezing your baked yogurt bars is a great way to extend their shelf life. Once they have cooled completely, cut them into individual portions. Wrap each bar tightly in plastic wrap or aluminum foil, then place them in an airtight container or freezer bag. They can be frozen for up to three months. When you’re ready to enjoy, simply thaw them in the refrigerator overnight or pop them in the microwave for a quick reheat.
What can I substitute for oat flour?
If you don’t have oat flour on hand, don’t fret! You can easily substitute it with equal parts of whole wheat flour, almond flour, or even all-purpose flour. However, keep in mind that the texture might vary slightly. If you’re looking for a gluten-free option, any gluten-free flour blend should work nicely, just make sure it’s one that binds well.
How long do they last in the fridge?
Stored properly in an airtight container, your baked yogurt bars will last about 5-7 days in the fridge. That makes them a perfect grab-and-go breakfast or snack for busy days ahead. Just remember to check for any signs of spoilage before consuming them, as freshness can vary depending on ingredients used.
Are there dairy-free options available?
Definitely! You can opt for plant-based yogurt made from coconut, almond, or soy. Be sure to choose a variety that has a similar texture and consistency to regular yogurt for the best results. This way, you can enjoy delicious, dairy-free baked yogurt bars without sacrificing flavor or texture.
For more tips on food storage, check out FoodSafety.gov.
Conclusion on Baked Yogurt Bars
Wrapping Up Your Homemade Snack Journey
There you have it—delicious and wholesome baked yogurt bars that are perfect for any occasion! Whether you’re rushing out the door in the morning or seeking a midday boost, these bars offer a delightful balance of flavor and nutrition.
Homemade snacks can easily fit your lifestyle—preserving your health without sacrificing taste. Plus, they’re customizable! Add your favorite nuts or fruits for a personal twist, making your baked yogurt bars uniquely yours.
If you’d like to explore more healthy snacking options, check out this guide from Healthline for inspiration. Happy baking!
PrintBaked Yogurt Bars: Easy, Healthy Treats for Your Family

Discover delicious and healthy baked yogurt bars that your whole family will love. These treats are easy to make and perfect for snack time!
- Prep Time: 15 minutes
- Cook Time: 30 minutes
- Total Time: 45 minutes
- Yield: 12 bars 1x
- Category: Snacks
- Method: Baking
- Cuisine: American
- Diet: Healthy
Ingredients
- 2 cups Greek yogurt
- 1 cup rolled oats
- 1/4 cup honey
- 1/2 cup mixed berries
- 1 teaspoon vanilla extract
- 1/4 teaspoon salt
Instructions
- Preheat your oven to 350°F (175°C).
- In a mixing bowl, combine Greek yogurt, rolled oats, honey, vanilla extract, and salt until well blended.
- Fold in mixed berries.
- Pour the mixture into a greased baking dish.
- Bake for 25-30 minutes or until the edges are golden.
- Allow to cool, then cut into bars.
Notes
- Store leftovers in the fridge for up to a week.
- These bars can be frozen for longer storage.
Nutrition
- Serving Size: 1 bar
- Calories: 150
- Sugar: 10g
- Sodium: 50mg
- Fat: 3g
- Saturated Fat: 1g
- Unsaturated Fat: 2g
- Trans Fat: 0g
- Carbohydrates: 28g
- Fiber: 3g
- Protein: 7g
- Cholesterol: 10mg
Keywords: Baked Yogurt Bars, healthy snacks, family treats