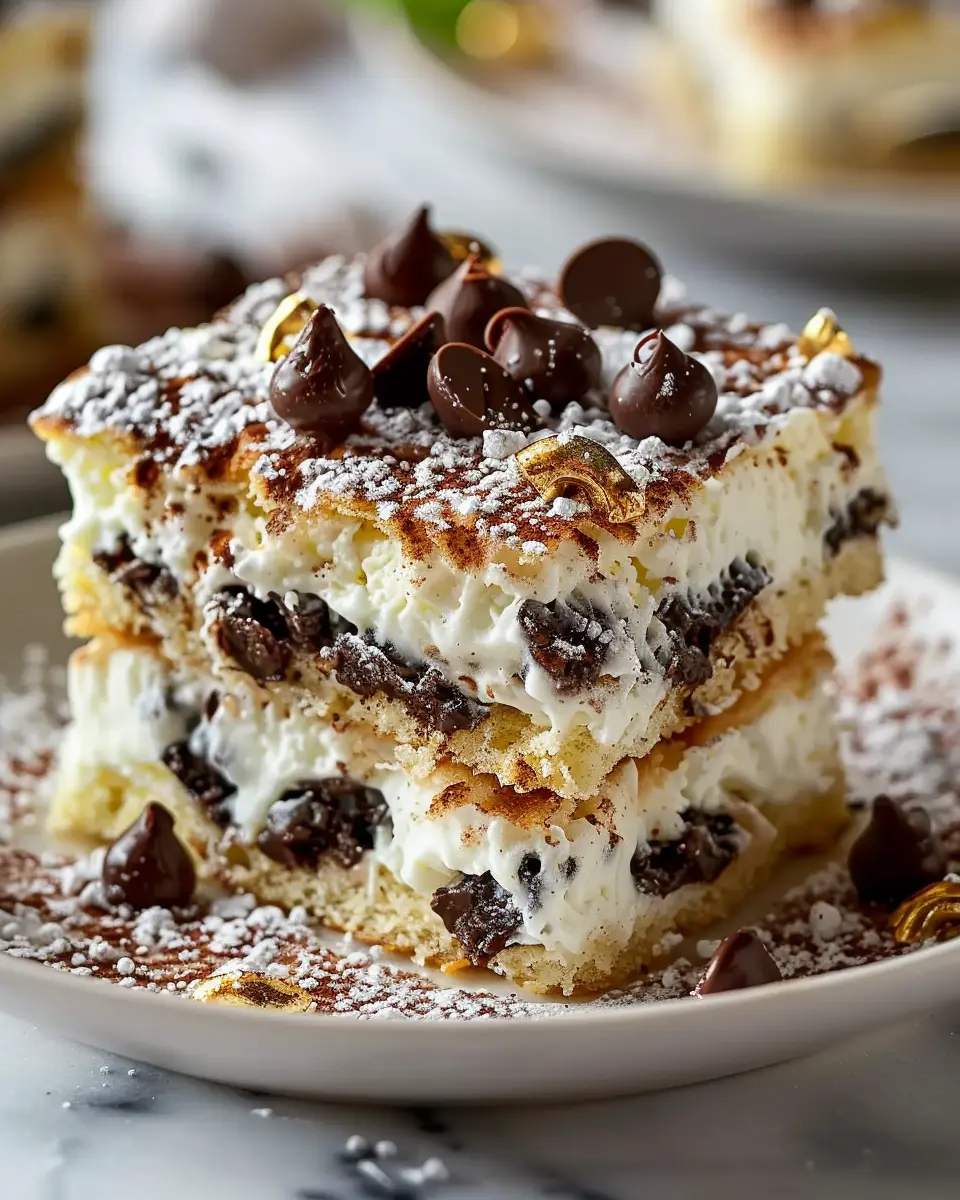
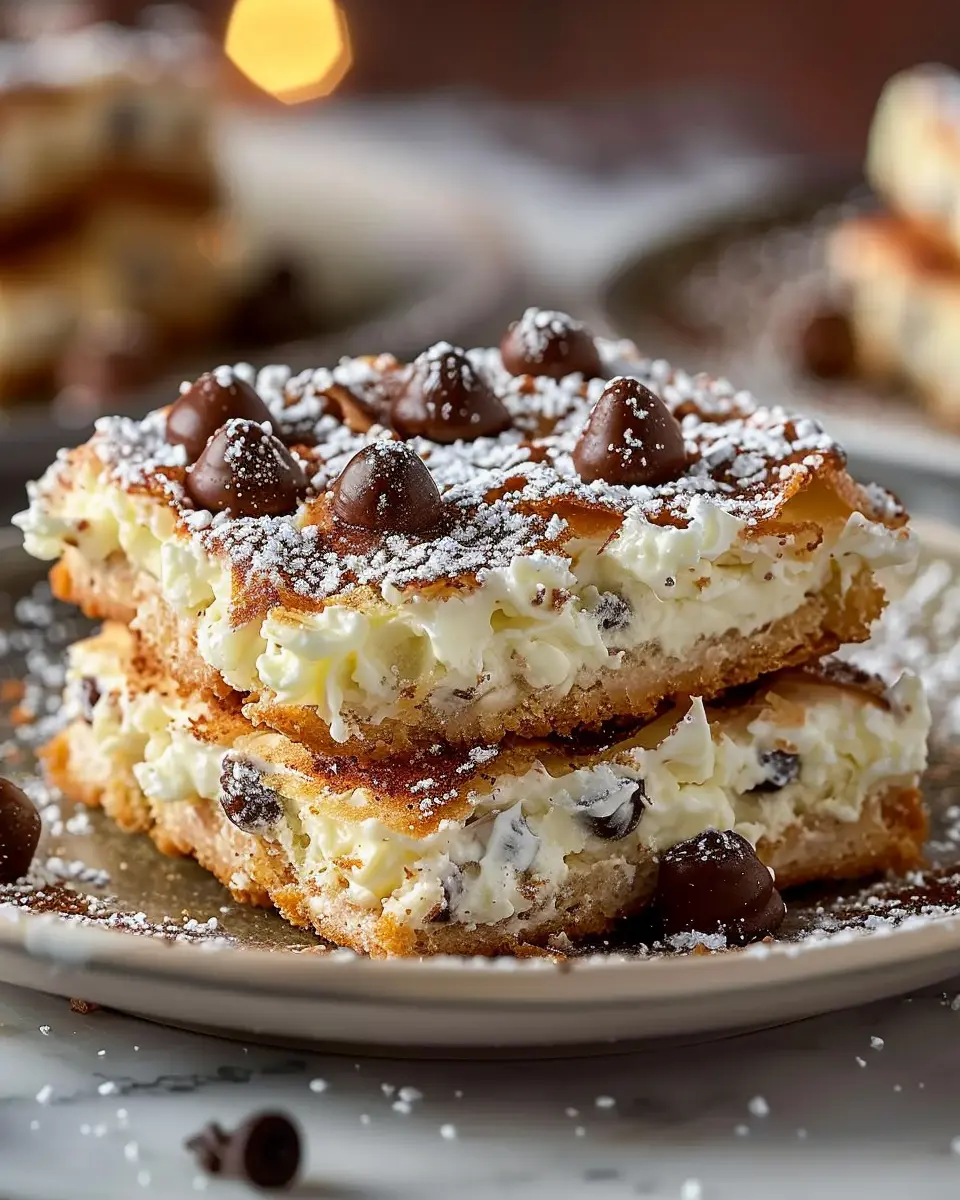
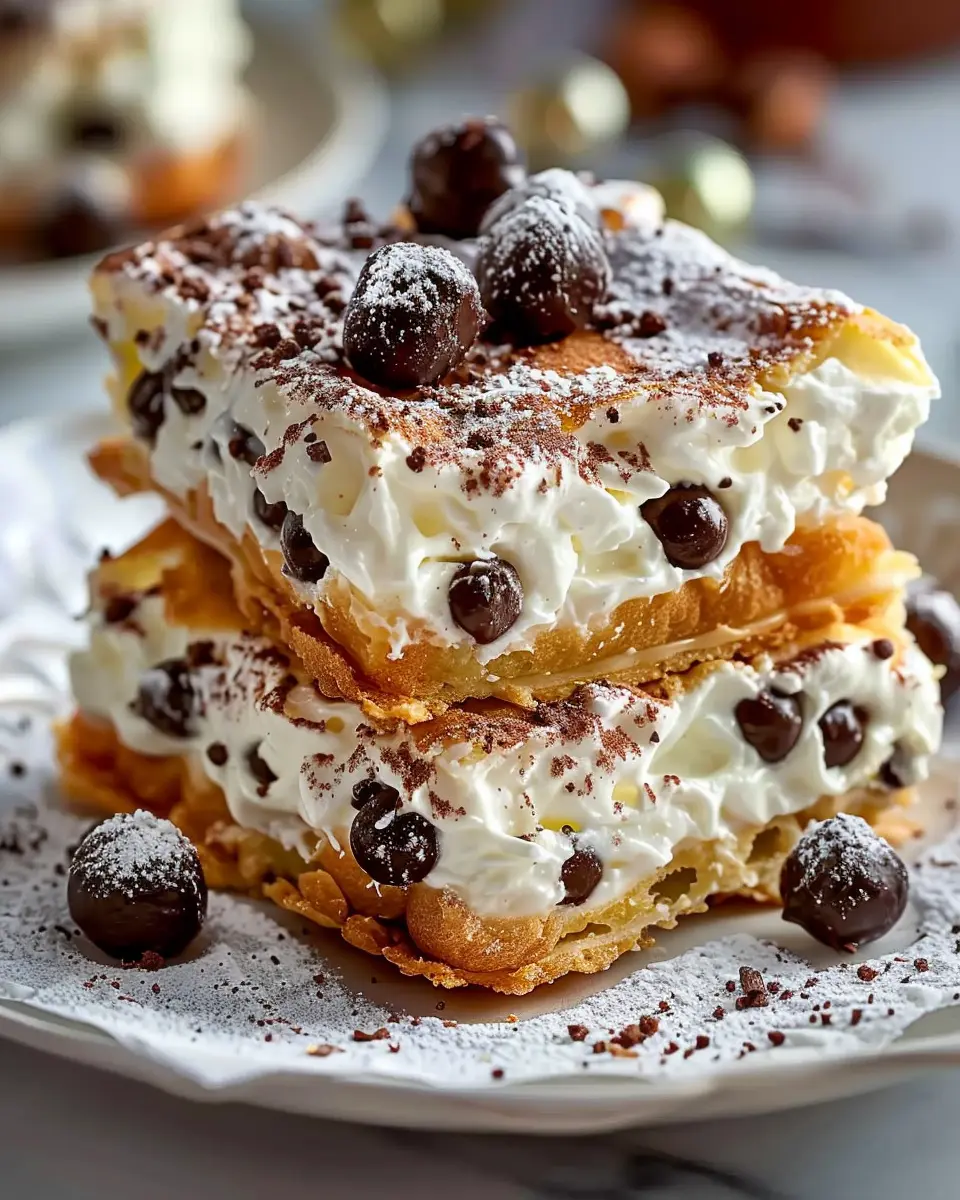
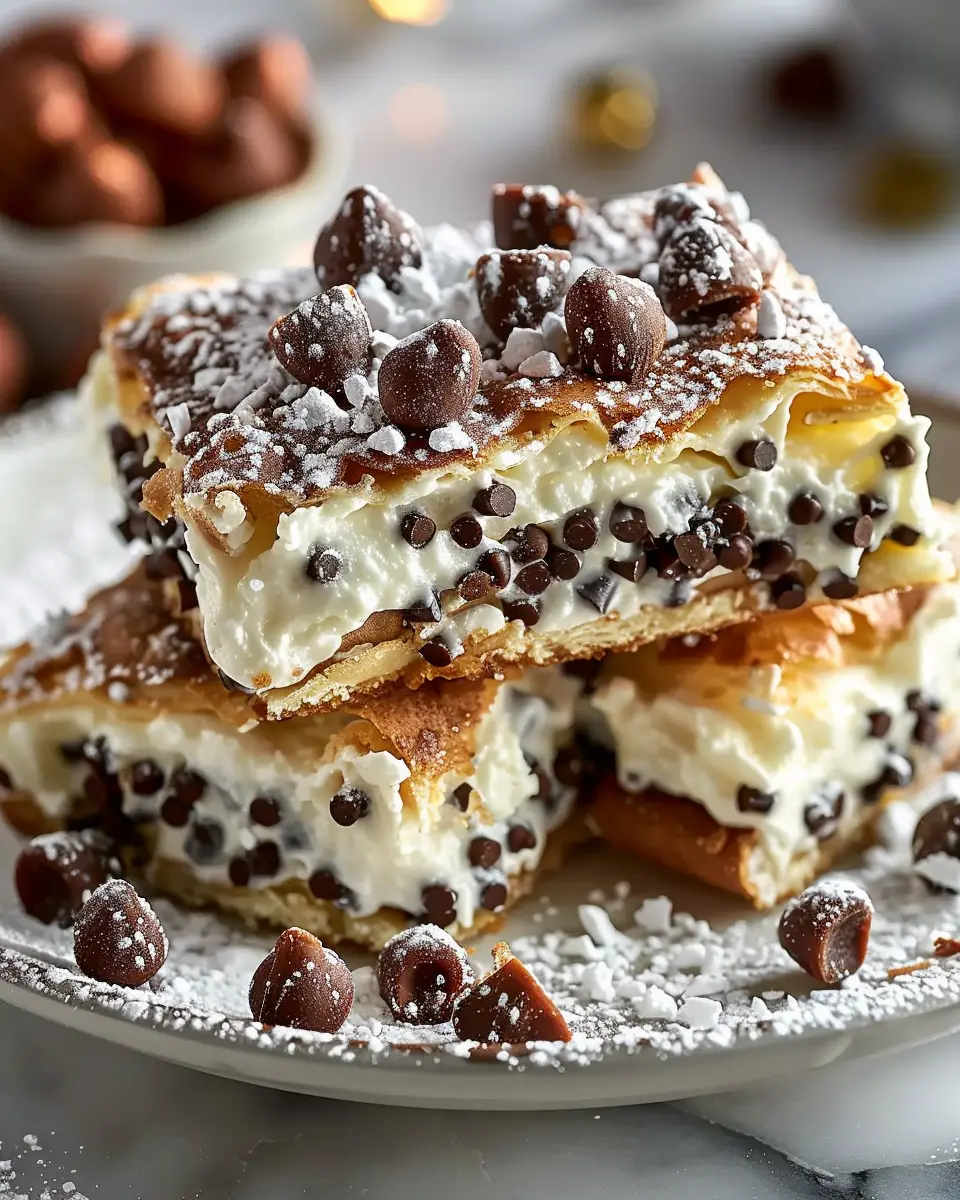
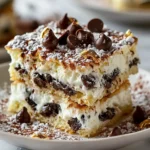
Introduction to Classic Cannoli Squares
When it comes to decadent desserts, few things compare to the classic Italian treat we know as cannoli. But have you ever thought about enjoying this beloved dessert in a slightly different form? Enter classic cannoli squares: a delightful twist on the traditional cannoli that offers the same rich flavors in a convenient, easy-to-serve format. These squares combine the creaminess of ricotta, the crunchiness of a crisp pastry, and a sprinkle of chocolate chips, making them the perfect treat for any occasion.
So, what makes classic cannoli squares a delightful dessert? First and foremost, it’s the harmony of textures. The flaky, golden crust gives way to a smooth, creamy filling that’s not only satisfying to eat but visually appealing as well. The addition of chocolate chips, candied oranges, or even a hint of cinnamon can elevate the flavor profile, making each bite a new experience. Imagine lifting a square from the pan, seeing the beautiful layers, and anticipating the deliciousness that awaits.
These squares are not just delicious; they’re also incredibly versatile. You can serve them at your next dinner party, bring them to a potluck, or simply enjoy them as a sweet treat at home. Looking for a cannoli squares recipe that accommodates dietary restrictions? With a few adjustments, you can whip up a gluten-free version without sacrificing any flavor. Check out resources like The Kitchn or Bon Appétit for tips on making substitutions.
Moreover, if you’re short on time but still want to impress your friends, these squares require less hands-on time than traditional cannoli. You can make them ahead of time and let them chill in the fridge until you’re ready to serve. It’s the kind of dessert that checks off all the boxes: easy to make, beautiful to present, and absolutely delightful to eat.
So, whether you’re a seasoned baker or a kitchen novice, classic cannoli squares are an excellent dessert choice that promises to please a crowd. Get ready to dive into this sweet, creamy experience!
Ingredients for Classic Cannoli Squares
Essential ingredients for the filling
When it comes to the filling of your classic cannoli squares, you want a blend that delivers that rich, creamy texture. Here’s what you’ll need:
- Ricotta cheese: The star ingredient. Opt for whole milk ricotta for creaminess.
- Mascarpone cheese: This adds a luscious, velvety quality.
- Powdered sugar: For just the right amount of sweetness.
- Vanilla extract: A splash enhances the flavor beautifully.
- Mini chocolate chips: For that classic cannoli crunch and taste.
Ingredients needed for the crust
The crust is just as important as the filling. Here’s how to create a sturdy yet buttery base:
- All-purpose flour: This will provide structure.
- Butter: Use unsalted for balanced flavor.
- Sugar: Granulated is perfect for sweetness.
- Eggs: Vital for binding everything together.
- Baking powder: This gives the crust a light, airy feel.
Optional garnishes to elevate the treat
Take your classic cannoli squares to the next level with some delightful garnishes:
- Chopped pistachios: For a pop of color and an earthy crunch.
- Powdered sugar sprinkle: A classic touch that looks beautiful.
- Chocolate drizzle: Because who doesn’t love a little extra chocolate?
By selecting the right ingredients, you set the stage for a delightful culinary experience! If you’re interested in more tips on crafting the perfect dessert, check out this guide on baking fundamentals for additional insights.
Preparing Classic Cannoli Squares
Creating classic cannoli squares in your own kitchen can be a delightful and rewarding experience. Let’s go through this step-by-step, ensuring you have everything you need to whip up this delicious dessert that pays homage to the traditional Italian cannoli.
Prepare the cannoli filling
The heart of any classic cannoli squares recipe lies in the filling. Here’s how to achieve that dreamy consistency:
-
Ingredients: You’ll need ricotta cheese (16 oz), confectioners’ sugar (3/4 cup), vanilla extract (1 teaspoon), and chocolate chips (1/2 cup). Some people also like to add a pinch of cinnamon for that extra touch.
-
Mixing: In a bowl, start by draining the ricotta cheese to remove excess moisture. Mix it with confectioners’ sugar and vanilla extract until smooth. Stir in the chocolate chips. This filling should be creamy yet not overly loose; you want it to hold its shape during baking.
This filling can be made ahead of time; in fact, letting it chill in the fridge for a bit intensifies the flavors. For more in-depth guidance on making the perfect cannoli filling, consider checking out Fine Cooking.
Preheat the oven for optimal baking
Before diving into the pastry-making, it’s essential to preheat your oven to 350°F (175°C). Preheating ensures that your classic cannoli squares bake evenly and develop that golden crust you’re aiming for. While waiting, you can take this time to prepare your baking dish and the crust.
Roll out and fit the pie crust into the baking dish
-
Ingredients: You can either use a store-bought pie crust or make your own. If you’re making your own, a simple recipe with flour, butter, and salt works wonders.
-
Fitting the crust: Roll out your dough to about 1/8-inch thickness. Gently place it in a greased 9×13-inch baking dish, making sure it covers the bottom and edges. Trim any excess. If your dough tears, don’t fret—patches can look charming and rustic!
This crust forms the perfect base for your classic cannoli squares, so be meticulous here.
Fill the crust with the creamy cannoli mixture
With the crust ready, it’s time to fill it with that luscious mixture you prepared earlier. Pour the cannoli filling evenly over the crust, spreading it with a spatula to ensure every corner is filled. Remember, it’s okay if it’s not perfect—sometimes the homemade touches make things more charming.
Prepare and place the top crust
To elevate your classic cannoli squares visually and texturally, you’ll need a second layer of crust (or crumble). Roll out another batch of dough and cut it into strips to create a lattice pattern, or simply cover the filling with another sheet of dough. If you’re pressed for time, the traditional method works fine—just poke some holes to vent.
Bake to golden perfection
Now, slide your dish into the preheated oven, allowing it to bake for about 30-35 minutes. The goal is to achieve a bubbly filling and a golden-brown crust. All of those beautiful aromas will fill your kitchen—just wait until you share this with your friends!
Cool and cut into squares
After baking, it’s crucial to let your classic cannoli squares cool at room temperature for at least 30 minutes. This allows the filling to set up. Once ready, cut them into squares and dust with additional confectioners’ sugar before serving—they’ll look irresistible!
Enjoy your culinary masterpiece, and don’t forget to relish each bite of these classic cannoli squares. They’re ideal for any occasion, impressing guests or indulging in a sweet moment for yourself. Who wouldn’t want a slice of Italy right at home?
Variations on Classic Cannoli Squares
Creating classic cannoli squares is just the beginning! These delightful pastries can be easily adapted to suit a variety of tastes. Here are some fun variations to inspire your next bake.
Chocolate Cannoli Squares for the Chocolate Lovers
If you think classic cannoli squares can’t get any better, think again! For the chocolate enthusiasts among us, adding cocoa to the ricotta mixture makes for an undeniably delicious treat. Simply incorporate:
- 1/4 cup of unsweetened cocoa powder into your ricotta filling
- Mini chocolate chips for added crunch and sweetness
This transformation not only enhances the flavor but also gives the dessert a beautiful, rich hue. Pair these chocolate delights with a fresh coffee or a sweetened almond milk for the perfect dessert experience.
Need a quick recipe tip? Try drizzling melted dark chocolate over the squares before serving for that extra wow factor. You can check out this guide on choosing the best chocolate for your baking to find the perfect match!
Fruit-Infused Cannoli Squares for a Fresh Twist
For those who enjoy vibrant flavors, adding fruit to your classic cannoli squares can elevate your dessert to new heights. Why not blend in some finely chopped fruits such as:
- Strawberries
- Raspberries
- Or even peaches
Mix these delicious additions directly into your ricotta filling for a fresh, fruity flair. Imagine sinking your fork into a creamy square with bites of juicy fruit bursting in every mouthful.
Plus, if you’re feeling adventurous, consider using a fruit puree drizzled on top, making your classic cannoli squares not only taste amazing but also look stunning. Looking for perfect fruit picks? Check out the seasonal fruit guide to know what’s ripe and ready.
Try these variations and make your next dessert table a conversation starter. Happy baking!
Cooking Tips and Notes for Classic Cannoli Squares
Tips for Achieving the Creamiest Filling
To ensure your classic cannoli squares have that indulgent, creamy filling, start with whole milk ricotta. Be sure to drain it overnight for the best texture—this removes excess moisture and prevents sogginess. Mixing in a splash of heavy cream can enhance the richness, giving you that luxurious mouthfeel. Don’t shy away from incorporating powdered sugar to sweeten it just right; this sugar type dissolves quickly, blending beautifully with the ricotta. And for a hint of sophistication, consider adding a splash of vanilla extract and some finely chopped chocolate or citrus zest for an extra flavor kick.
Notes on Crust Alternatives for Dietary Needs
If you’re looking to adapt the crust for dietary restrictions, there are numerous options. For a gluten-free alternative, use ground almonds or gluten-free flour blends, ensuring a similar texture without the gluten. Vegan bakers might opt for coconut oil or vegan butter in the crust, replacing the traditional butter. This way, everyone can enjoy those classic cannoli squares. Curious about these alternatives? Check out Healthline’s article on gluten-free flours for further tips.
Experimenting with the filling and crust can make your classic cannoli squares a showstopper for any gathering!
Serving Suggestions for Classic Cannoli Squares
Creative Ways to Present Your Cannoli Squares
When it comes to serving classic cannoli squares, presentation makes a huge difference! Consider using individual dessert plates for a more refined touch. You can also stack the squares in a fun pyramid shape on a large platter, garnished with sprigs of mint or a dusting of powdered sugar. For an Instagram-worthy touch, drizzle melted chocolate or caramel sauce over the top, creating an elegant yet inviting look.
Pairing Ideas to Enhance the Dessert Experience
To truly elevate your classic cannoli squares, think about pairing them with delightful accompaniments. A scoop of vanilla bean ice cream adds a creamy contrast that complements the ricotta filling beautifully. You might also consider serving a side of freshly brewed herbal tea or rich coffee. Not only does this balance the sweetness, but it also opens up conversation about flavors and preferences! For a refreshing twist, add some fresh berries on the side—these can add not just color but also a burst of juicy flavor.
These thoughtful serving suggestions can transform your dessert experience, delighting friends and family alike. For more ideas on dessert or hosting, check out resources like Bon Appétit or Food Network for inspiration!
Time Breakdown for Classic Cannoli Squares
When you’re gearing up to make classic cannoli squares, it’s always handy to know how much time you’ll need. Here’s a quick breakdown to help you plan your baking adventure.
Preparation Time
Getting everything in order takes about 20 to 30 minutes. Assemble your ingredients and prep your workspace! Trust me, a little organization goes a long way when you’re mixing that creamy filling.
Baking Time
Once your squares are ready to go in the oven, they’ll need about 30 to 35 minutes of baking. Keep an eye on them; the golden color is your cue to pull them out!
Total Time
All in all, you’re looking at around an hour for delicious classic cannoli squares from start to finish. It’s an achievable and rewarding endeavor, especially when you think about the sweet treats awaiting you!
For more tips on ingredient prep, check out this helpful cooking guide.
Nutritional Facts for Classic Cannoli Squares
When indulging in classic cannoli squares, you might be curious about the nutritional breakdown. Here’s a quick glance to help you enjoy these delectable treats mindfully.
Calories
Each serving of these delightful squares packs approximately 250 calories. It’s perfect for a sweet treat that won’t completely derail your diet.
Protein
You’ll find around 4 grams of protein in these squares. This bit of protein helps balance out the sweetness and keeps you feeling satisfied.
Sugar
With about 15 grams of sugar per serving, these classic cannoli squares are certainly sweet. Enjoy them in moderation, especially if you’re watching your sugar intake.
For additional details on mindful eating, consider checking out resources from the American Heart Association. Enjoy these squares and their rich flavors while staying informed about your nutritional choices!
FAQs about Classic Cannoli Squares
Can I make the filling ahead of time?
Absolutely! Preparing the filling for your classic cannoli squares ahead of time can save you a lot of stress. Just combine the ricotta, mascarpone, vanilla extract, and any desired mix-ins like chocolate chips or orange zest, then store it in an airtight container in your refrigerator. It can be made up to 24 hours in advance. Just give it a good stir before you spread it over the crust for the freshest taste.
What are some gluten-free options for the crust?
If you’re looking for gluten-free alternatives, you have a few tasty options! Consider using almond flour or a gluten-free all-purpose blend for the crust. These alternatives maintain the crunch of traditional crust while catering to gluten-sensitive tastes. Bob’s Red Mill and King Arthur Baking Company offer reputable gluten-free flours that work wonderfully. Always remember to check labels for cross-contamination if you’re baking for someone with celiac disease.
How do I store leftover cannoli squares?
Storing your classic cannoli squares properly ensures they remain delicious for days. Place any uneaten squares in an airtight container in the refrigerator. They should stay fresh for about 3 to 4 days. If you want to keep them longer, consider freezing them. Just be sure to wrap them tightly before placing them in a freezer-safe container. They can last up to a month in the freezer, although the texture may slightly change once thawed.
When you’re ready to enjoy them again, allow them to thaw in the fridge and then serve! These storage tips can help prevent waste and keep your dessert game strong. Have fun baking and indulge in these delightful bites!
Conclusion on Classic Cannoli Squares
Final thoughts on making and enjoying cannoli squares at home
Creating classic cannoli squares in your kitchen is not just about the delicious end product; it’s an experience to savor. The sweet, creamy filling paired with the crunchy, golden crust makes for an irresistible dessert that’s bound to impress.
While the recipe may seem intricate, breaking it down into simple steps makes the process enjoyable. Don’t hesitate to add your personal twist, whether through flavored ricotta or festive toppings. Serve these delights at your next gathering or just as a treat for yourself — either way, they’re sure to evoke a sense of indulgence.
For more tips and inspirations on desserts, check out resources like Taste of Home or Serious Eats. Happy baking!
PrintClassic Cannoli Squares: Easy Indulgence for Homemade Delight
Classic Cannoli Squares are a delicious take on the traditional Italian dessert, offering a delightful homemade indulgence.
- Prep Time: 20 minutes
- Cook Time: 0 minutes
- Total Time: 2 hours 20 minutes
- Yield: 16 squares 1x
- Category: Dessert
- Method: No-bake
- Cuisine: Italian
- Diet: Vegetarian
Ingredients
- 1 cup ricotta cheese
- 1 cup mascarpone cheese
- 1 cup powdered sugar
- 1 teaspoon vanilla extract
- 1 teaspoon ground cinnamon
- 2 cups graham cracker crumbs
- 4 tablespoons unsalted butter, melted
- 1/2 cup mini chocolate chips
Instructions
- In a large bowl, mix the ricotta and mascarpone cheeses until smooth.
- Stir in the powdered sugar, vanilla extract, and ground cinnamon until well combined.
- In another bowl, combine the graham cracker crumbs and melted butter.
- Press half of the graham cracker mixture into the bottom of a greased baking dish.
- Spread the cheese mixture evenly over the crust.
- Top with the remaining graham cracker mixture and sprinkle with mini chocolate chips.
- Chill in the refrigerator for at least 2 hours before serving.
Notes
- For added flavor, consider folding in some chopped pistachios.
- Serve with a dusting of additional powdered sugar on top.
Nutrition
- Serving Size: 1 square
- Calories: 200
- Sugar: 12g
- Sodium: 50mg
- Fat: 9g
- Saturated Fat: 5g
- Unsaturated Fat: 3g
- Trans Fat: 0g
- Carbohydrates: 28g
- Fiber: 1g
- Protein: 3g
- Cholesterol: 30mg
Keywords: Classic Cannoli Squares